Friday, February 28, 2014

Authentique's Smitten and Lovely

 
The paper used on this layout id from Authentique's Smitten line 2012, and some from Authentique's Lovely line from 2013. I was influenced on the structure of the layout by Kelly Goree's Home Grows layout she published on her blog in July of 2009. Even if I used photographs in color and not as many patchwork squares, I liked how it came out. Still not as professional as Kelly's - but hey I have been out of the loop for awhile. This was my sons "Best Day Ever!" He looked forward to the
Valentine Dance at school for a whole month. He made his own appointment at the hairdressers so he would have a cool hair cut. He wanted his hair just like how it was the last time he had a hair cut. He picked out hi clothes in advance and laid them out. Asked a girl in his class to be "his Valentine" so for sure she would dance with him. So cute, how they get all excited about this stuff!
 

Monday, February 24, 2014

Authentique - Lovely Collection

http://authentiquepaper.com/products/Lovely
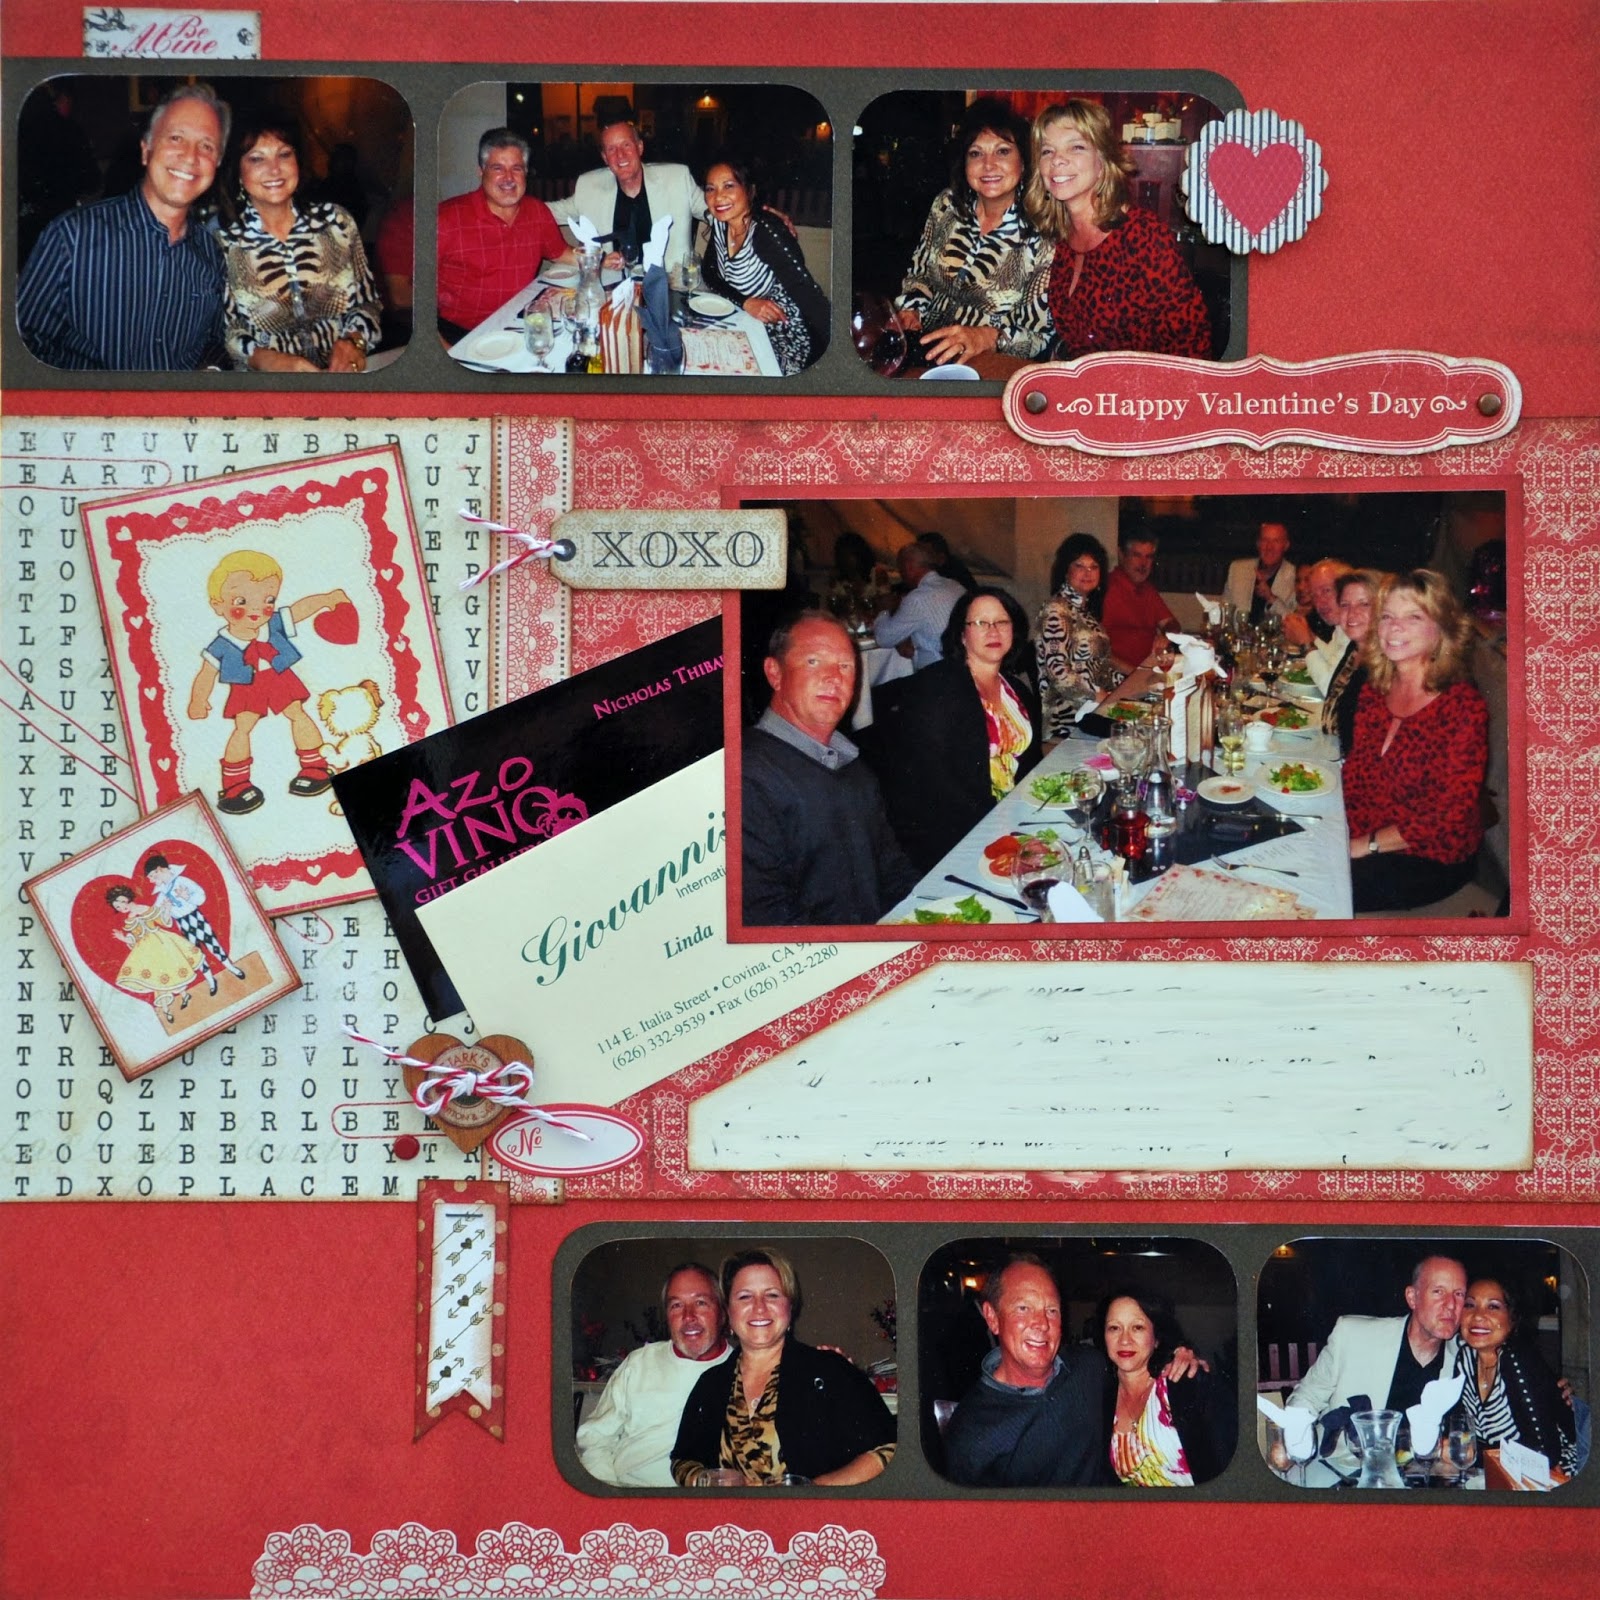
 I scrapped the photo's from Valentine's Day using Authentique's Lovely collection. We had a great Valentine's evening that was planned by my friend. Yes, she planned the whole evening for all of us. The men got to respond on her E-Vite that she sent out, whether they planned to attend. Her husband then adjusted the reservations according to the number of guests who planned on attending.
I thought the Authentique paper from the Lovely Collection best displayed the photo's from our evening out. The dinner tables had these large Valentine heart shaped suckers in the center, which we promptly put into our mouths after dinner and took some cute photo's with them. It reminded me of the old fashioned Valentine's with the big red hearts. Then I remembered I purchased this paper and still had not used any of it yet. The other embellishments came from Jillibean Soup. The heart shaped wooden button and the oval conversation sticker, and some brads mixed throughout. 


No matter who planned the evening, we had a great time. Dinner in town that consisted of a special Valentine Menu, then we walked to the wine bar (where we had a table reserved for us as well), where we enjoyed spirits and dancing to a live band! The mayor of Covina was even there, and sat at our table! My friend also made Valentine candy stuffed mailboxes! So cute, she decorated them with stickers and filled them with candies... And by accident the women all wore some type of animal print! Just happened that way.

Wednesday, February 19, 2014

Mission Report - Unique Missions

http://www.missionscalifornia.com/
 
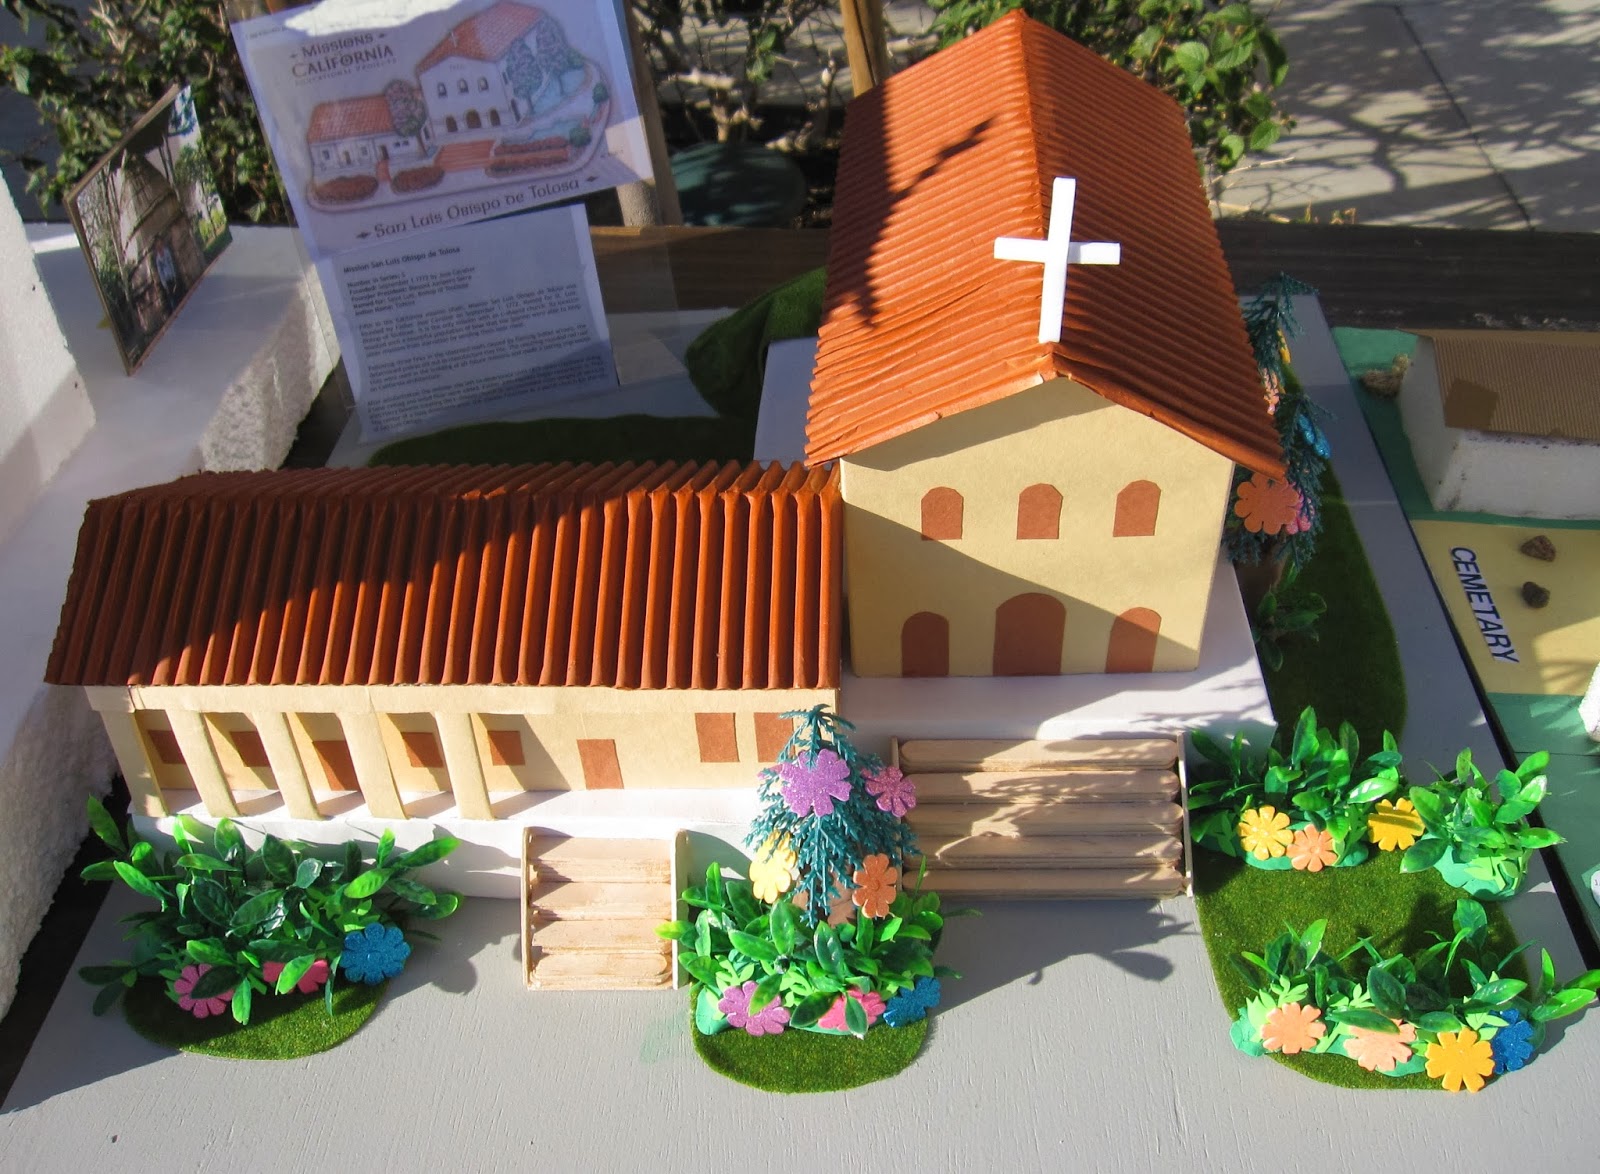
This is a post about creating the most unique California Missions using items that you may have already in your home. There is no need to buy a pre-designed Mission from the store that may be costly. This article will show you how to make an elaborate Mission (as shown),
 
http://www.missionscalifornia.com/
 
or a Mission that is entirely created using a piece of cardboard, construction paper, paint and plants from the garden. See Mission below.
 
http://www.missionscalifornia.com/
 
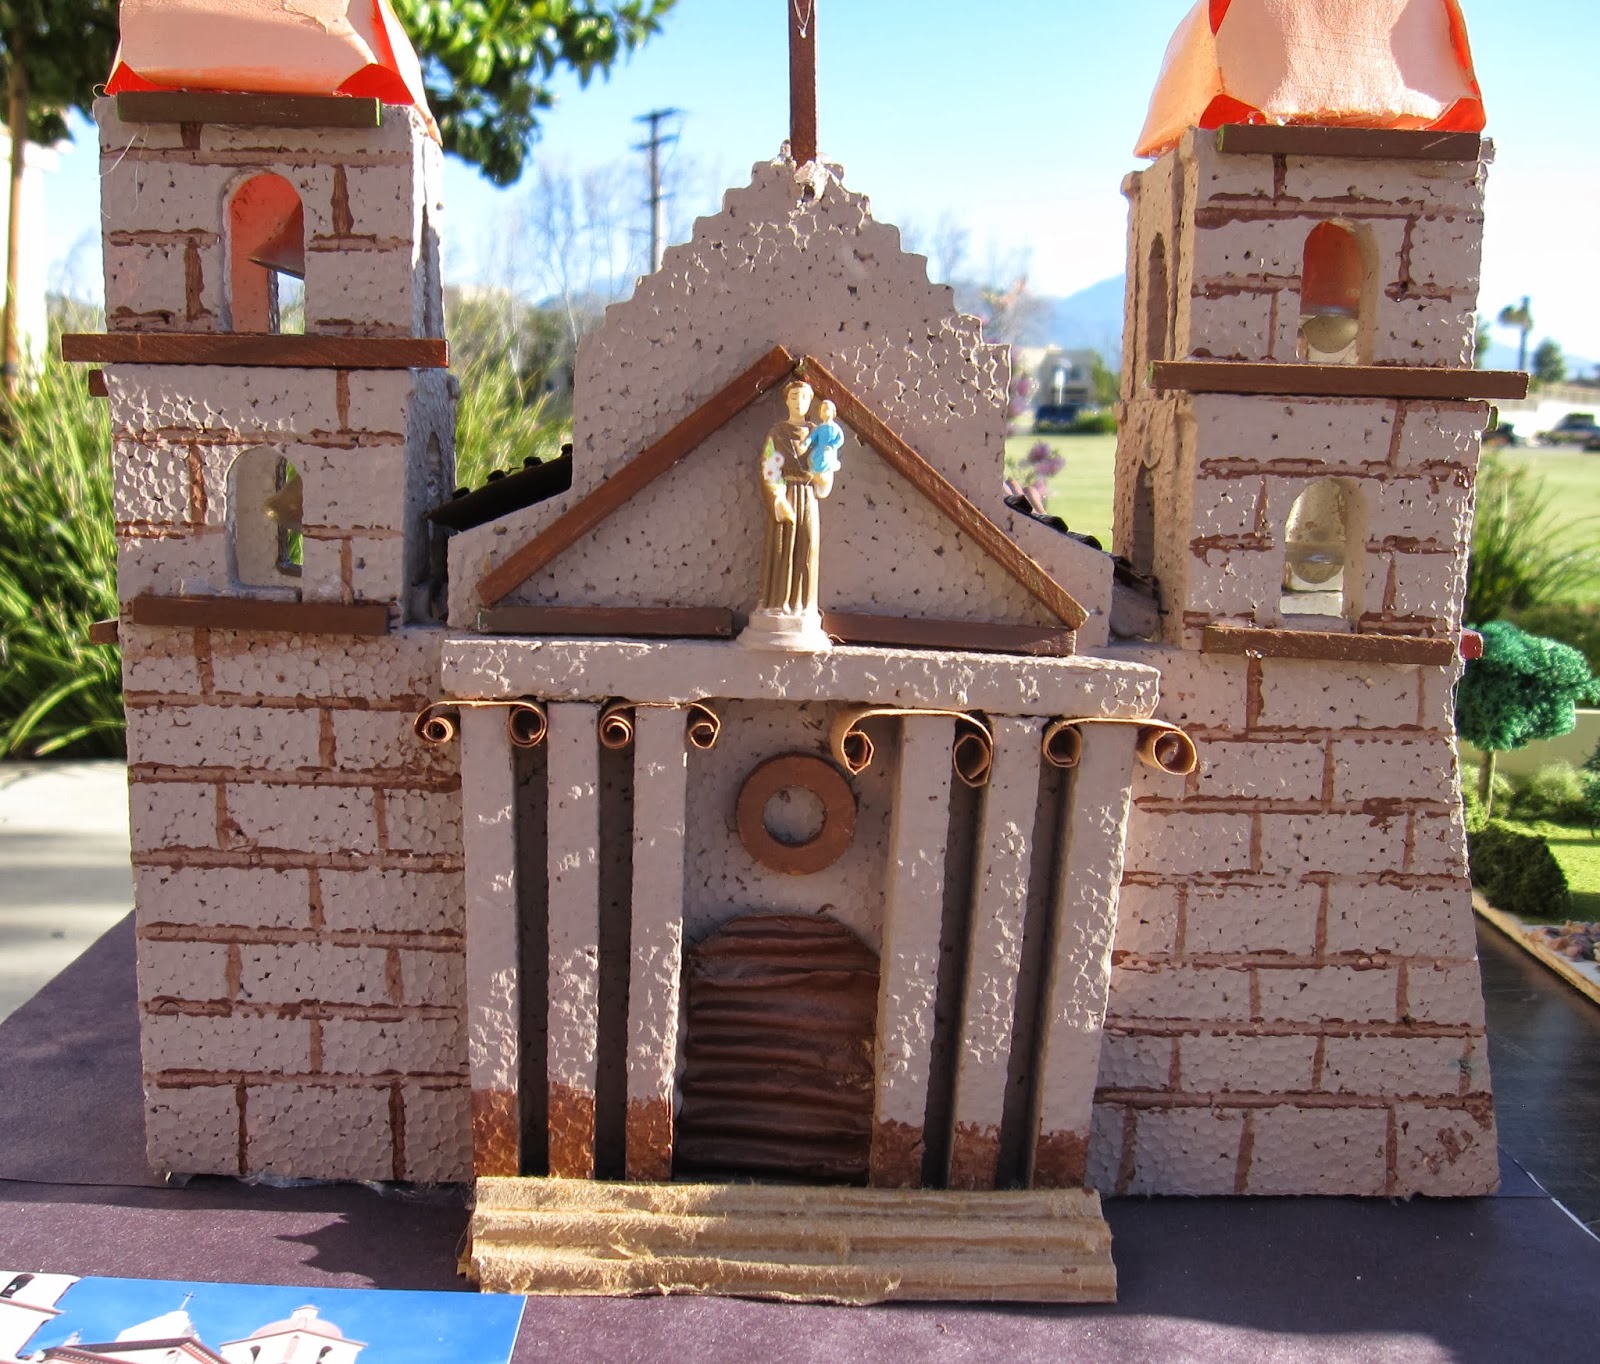
Styrofoam is another useful material. I this case the student cut styrofoam and then painted several coats on it. They used thick paper (or cardboard) to make the curls at the top of the pylons, cardboard stairs, cardboard door and a store bought statue. If you do cut stryofoam an adult should be present as stryofoam cuts really easy and the cutting tool could slip.
 
http://www.missionscalifornia.com/
 
This student used stryofoam and mixed it with cardboard (see below image). One can make the cardboard walls appear like stucco when paper mache is added. I have always used "fast mache." Despite it's name (it does take several hours to dry) this product is easy to use - just add water - and it becomes moldable. It is the perfect product to create your state when studying bodies of water and mountain elevations (another grade level). Construction paper is used on this Mission to create doors and windows. Store bought bells were used in the bell tower. A simple staircase made from construction paper with hand drawn stairs is represented here, and it works! Certainly a Mission created with little supervision.

http://www.missionscalifornia.com/
 
 
http://www.missionscalifornia.com/
 
The Mission here has the store bought roof, bells, plants and statues. The top of the bell tower was carved from styrofoam. The San Carlos de Borromeo de Carmel Mission below is another example of the use of construction paper, wood, some cardboard and items found around the house. A simple Mission that reflects a unique appearance of the aged Mission.
 
http://www.missionscalifornia.com/
 
Display a photo of the Mission next to your finished masterpiece helps to appreciate all of the work that went into the project to make the Mission appear realistic. Some students post a picture of themsleves in front of the Mission to show they have visited the Mission and have a true knowledge of the construction that went into building the mission back in 1772. Even if you are unable to travel to the Mission you have been assigned, a Mission in your area usually has a Gift Shop that will have information about your Mission.
 
http://www.missionscalifornia.com/
 
http://www.missionscalifornia.com/

Another thing to thing about is the board that you will be using to create your mission on. The board itself should be sturdy enough to carry the final Mission out of your home and into the car, and then into the classroom - without dislodging itself or buckeling. Most of the Missions, I have seen are on the durable display foam board that can be bought at Michael's Craft Stores. The Mission (below), is set on a wood constructed table that is beautifully displayed. I love the use of the same burnt orange brown paint on both the wood table and on the roof of the Mission.
 
http://www.missionscalifornia.com/
 
The gardens of the Missions can be created both elaborately like the one below, using store bought flowers and fountains, or simply like the Mission of San Juan
 
http://www.missionscalifornia.com/

http://www.missionscalifornia.com/
 
shown here, using items from around the house. The fence from a game, the blue stones from a candle display, trees from another project. But still the grounds look great even when they are displayed simply.
 
http://www.missionscalifornia.com/
 
Or when a bunch of different items are used in unison to create a garden. Even when the products are out of proportation from each other.

http://www.missionscalifornia.com/
 
http://www.missionscalifornia.com/

http://www.missionscalifornia.com/

What about the Missions that use unique products in their creation. I have on a previous post discussed the use of several cake mixes to create a cake mix Mission. I have also discussed the use of pasta (lasagne noodles) to create a roof.

http://www.missionscalifornia.com/

http://www.missionscalifornia.com/The student painted the noodles before applying them onto the roof (here). But I have seen the noodles applied first and then painted. Whichever works best. The roof that is pictured here, the noodles apppear to have been spray painted for a more even appearance.
http://www.missionscalifornia.com/
 
Another unique way to add texture to a roof, is using gum. This student took sticks of a pink colored gum and cut them into square looking pieces. Then glued them onto the roof. I would use a glue gun to keep them in place longer.
 
http://www.missionscalifornia.com/

Another Mission that was so creative was a Mission made from Legos! That is right Legos! I have a picture of the prayer room inside the Mission, but not one of the exterior for some reason. The http://www.missionscalifornia.com/Mission had an outside garden with animals from the Lego collection. Really cute. A project like this would have taken awhile to complete, so allow enough time. Plus the person would have to have alot of Legos to complete this project in the first place. Legos does not have a Mission kit (as of yet). but you can google Missions made from Legos and several appear which can easily be adopted to the Mission you want. Clever idea, which could be started on holiday break.
http://www.missionscalifornia.com/

But, sometimes the simplest of the Missions make some of the best representations. Here the student made a realistic version of the Mission in San Diego using cardboard, plaster, rocks and gravel from the yard, juniper bushes, modeling clay and a set of store bought Mission bells.

http://www.missionscalifornia.com/

Saturday, February 15, 2014

Basic Grey Clippings

http://www.basicgrey.com/scrapbook/shop/collections/show/current/clippings
 
I finished a page for my sons School Album. I used Basic Grey's Clippings for the paper. I know the line came out in 2012, but I am just now using my goods that I have collected. I love buying scrapbooks supplies and I have every intention of using them right away, but time escapes me. I am making it a mission to finish his School Album before he graduates from the eighth grade. At least, get a good portion of his school years finished!

http://www.basicgrey.com/scrapbook/shop/collections/show/current/clippings

Tuesday, February 11, 2014

checking in...

It has been a long, long time since I had a post on this site. I loved my blog and blogging. I think I was better at it when the Design Team for Scrappin' Good Times were encouraged to update their blogs. I was more creative then too! However, one of my resolutions this year was to start scrapbooking again and to USE some of the supplies that I have been "hording" for the past several years. So, I started a Christmas Album to put on the coffee table at Christmas time. It will just contain Christmas events from each year - plus I might add a Year in Review page so I remember what happened in each year. The years seem to blend, as I have been asked to find photo's for my sons graduation video, I am surprised by how many years have past. I would look in a folder from two years ago - when actually the event was from four years ago. Oh my!!!

What has happened in the last year for me is:

1. Laid off from my job of 8 years. Very depressing. I have not been able to find work yet.
2. Lauren went off to college out of state, so I miss her tremendously.
3. My husband sold his web business so he is "semi retired" now.
4. I just found out (or just developed) an allergy to Dairy Products!

I have to comment about my allergy as this is quite a blow to me - the person who loved to drink milk with ice in it everyday. I am allergic to dairy products. All of a sudden. I broke out into a heavy rash - hives actually. My tongue swelled, my face was swollen and my eyelids became puffy and distorted. The pads of feet swelled to the point it was uncomfortable to walk. I now can no longer have anything with dairy and have to carry an EpiPen. I am so sad when I think of all the things I love that contained dairy that I can no longer have: Egg Nog, Pumpkin Pie, Banana Cream Pie, Chocolate Shakes, Pancakes, Pasta with a Creamy Sauce, Lasagna, Tortilla Casserole... oh I can not write anymore - this is depressing. I am experimenting right now with various Soy Milks and Almond Milks. I made Chocolate Pudding despite the box stating that Soy Milk could not be used. Maybe I'll post some Dairy Free Recipes when I come up with some that are good. I did find a good Dairy Free Butter... tastes the same.

Anyway, wanted to make a quick post. I will post my layouts I made for the Christmas Album and I will let you know about my books that I am reading. I absolutely love so many lately. And I will post some Dairy Free Recipes! Thanks to those who are still on my Network Blog list. :)

LinkWithin

Related Posts with Thumbnails