Showing posts with label Missions. Show all posts

Wednesday, February 19, 2014

Mission Report - Unique Missions

http://www.missionscalifornia.com/
 
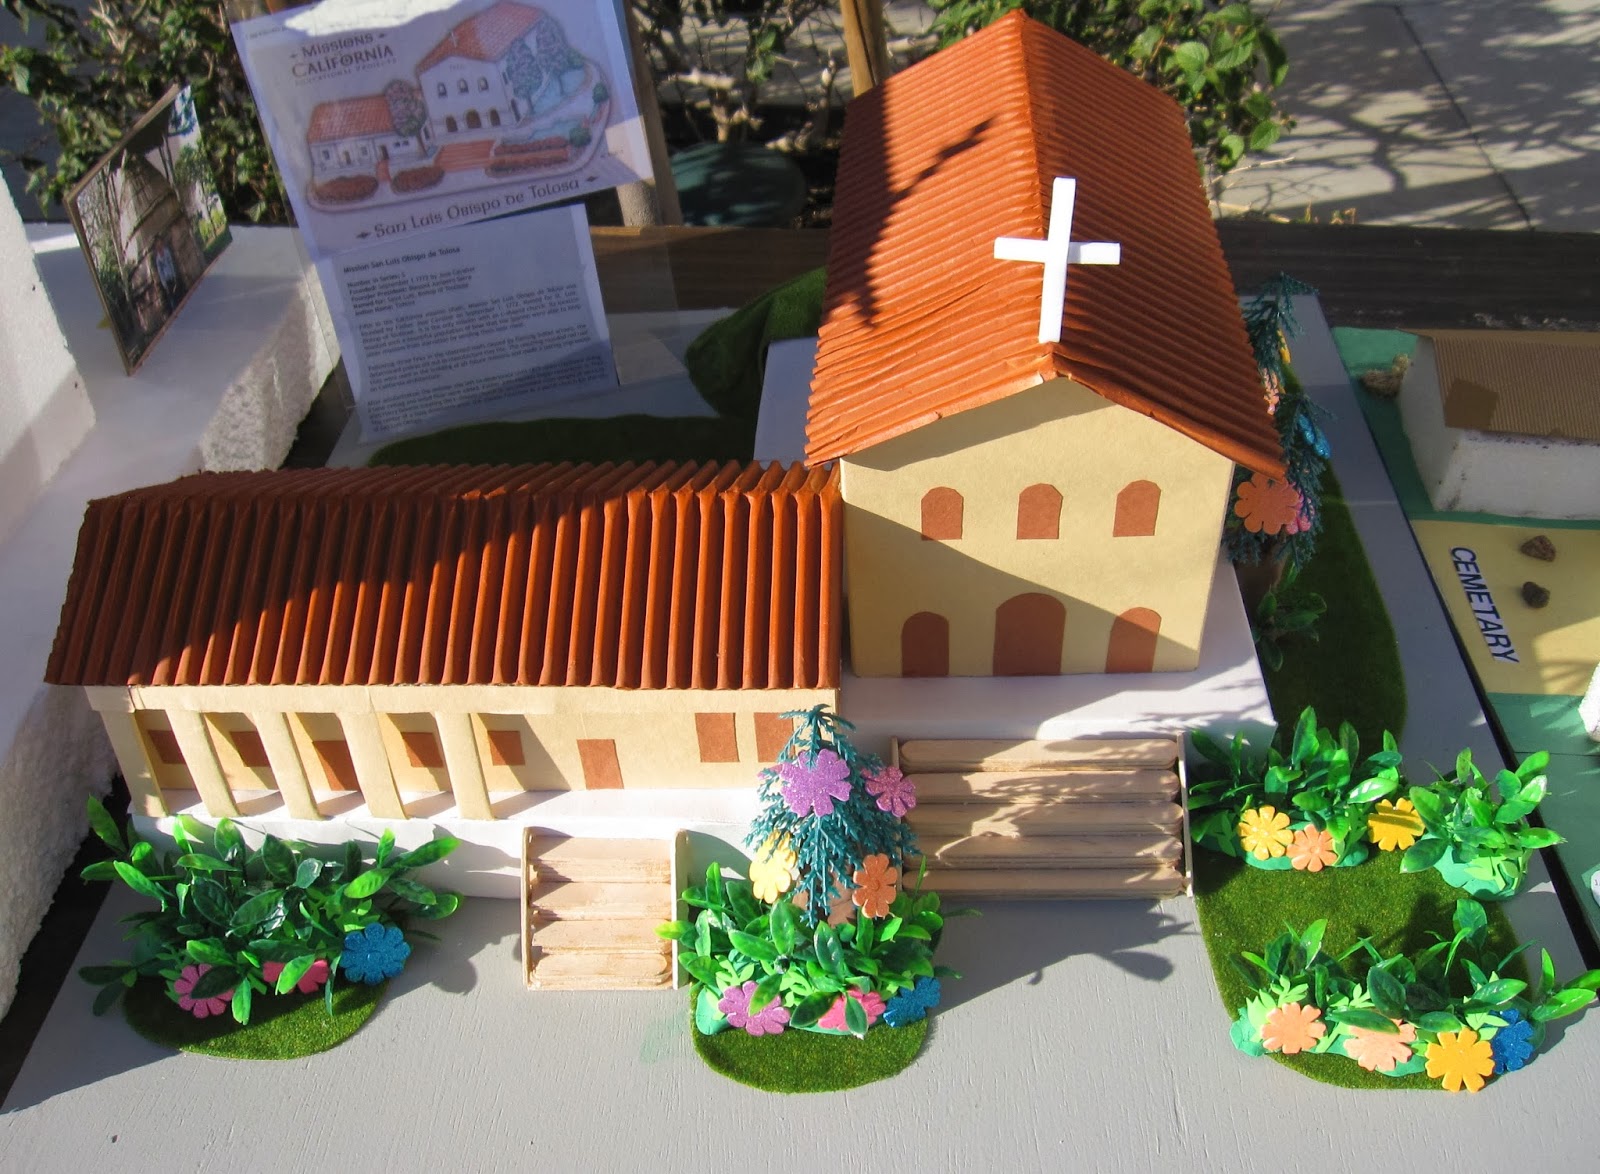
This is a post about creating the most unique California Missions using items that you may have already in your home. There is no need to buy a pre-designed Mission from the store that may be costly. This article will show you how to make an elaborate Mission (as shown),
 
http://www.missionscalifornia.com/
 
or a Mission that is entirely created using a piece of cardboard, construction paper, paint and plants from the garden. See Mission below.
 
http://www.missionscalifornia.com/
 
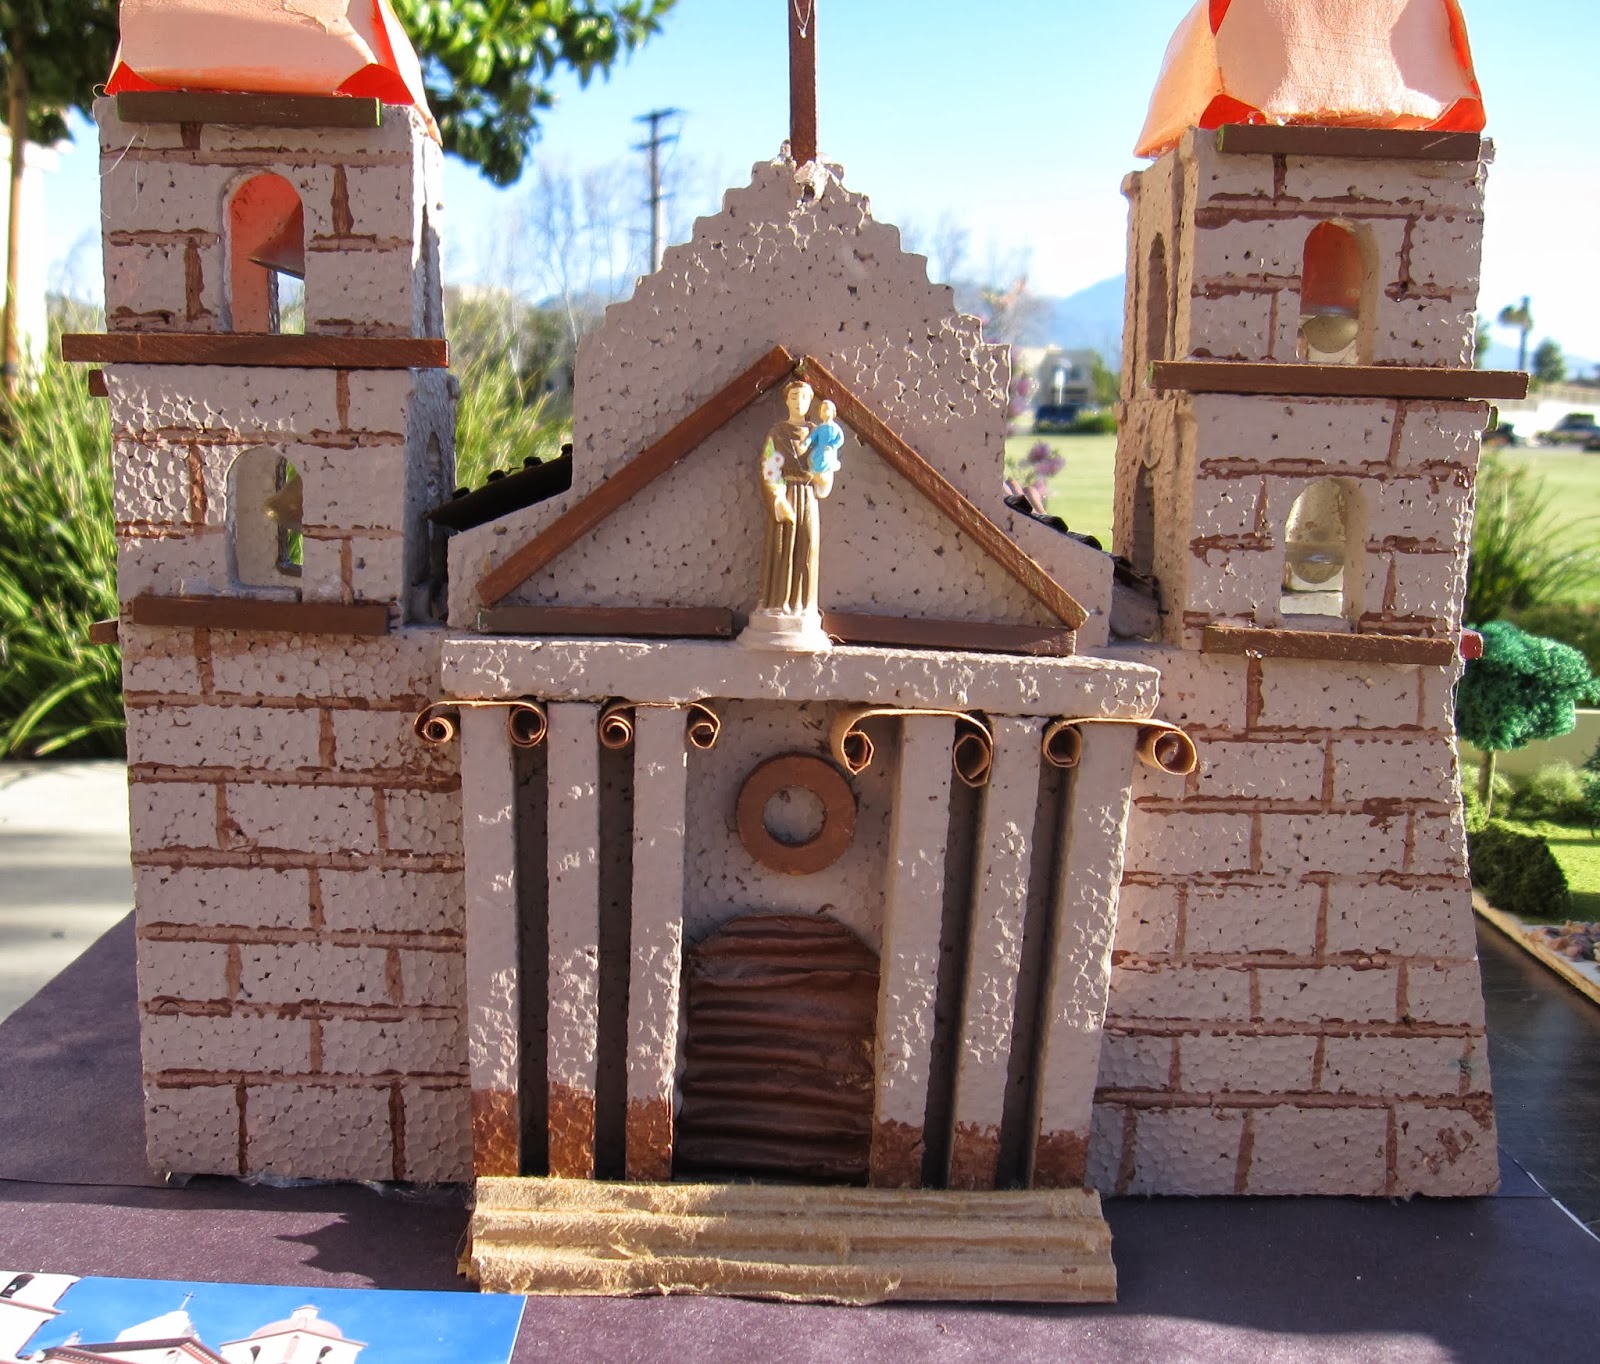
Styrofoam is another useful material. I this case the student cut styrofoam and then painted several coats on it. They used thick paper (or cardboard) to make the curls at the top of the pylons, cardboard stairs, cardboard door and a store bought statue. If you do cut stryofoam an adult should be present as stryofoam cuts really easy and the cutting tool could slip.
 
http://www.missionscalifornia.com/
 
This student used stryofoam and mixed it with cardboard (see below image). One can make the cardboard walls appear like stucco when paper mache is added. I have always used "fast mache." Despite it's name (it does take several hours to dry) this product is easy to use - just add water - and it becomes moldable. It is the perfect product to create your state when studying bodies of water and mountain elevations (another grade level). Construction paper is used on this Mission to create doors and windows. Store bought bells were used in the bell tower. A simple staircase made from construction paper with hand drawn stairs is represented here, and it works! Certainly a Mission created with little supervision.

http://www.missionscalifornia.com/
 
 
http://www.missionscalifornia.com/
 
The Mission here has the store bought roof, bells, plants and statues. The top of the bell tower was carved from styrofoam. The San Carlos de Borromeo de Carmel Mission below is another example of the use of construction paper, wood, some cardboard and items found around the house. A simple Mission that reflects a unique appearance of the aged Mission.
 
http://www.missionscalifornia.com/
 
Display a photo of the Mission next to your finished masterpiece helps to appreciate all of the work that went into the project to make the Mission appear realistic. Some students post a picture of themsleves in front of the Mission to show they have visited the Mission and have a true knowledge of the construction that went into building the mission back in 1772. Even if you are unable to travel to the Mission you have been assigned, a Mission in your area usually has a Gift Shop that will have information about your Mission.
 
http://www.missionscalifornia.com/
 
http://www.missionscalifornia.com/

Another thing to thing about is the board that you will be using to create your mission on. The board itself should be sturdy enough to carry the final Mission out of your home and into the car, and then into the classroom - without dislodging itself or buckeling. Most of the Missions, I have seen are on the durable display foam board that can be bought at Michael's Craft Stores. The Mission (below), is set on a wood constructed table that is beautifully displayed. I love the use of the same burnt orange brown paint on both the wood table and on the roof of the Mission.
 
http://www.missionscalifornia.com/
 
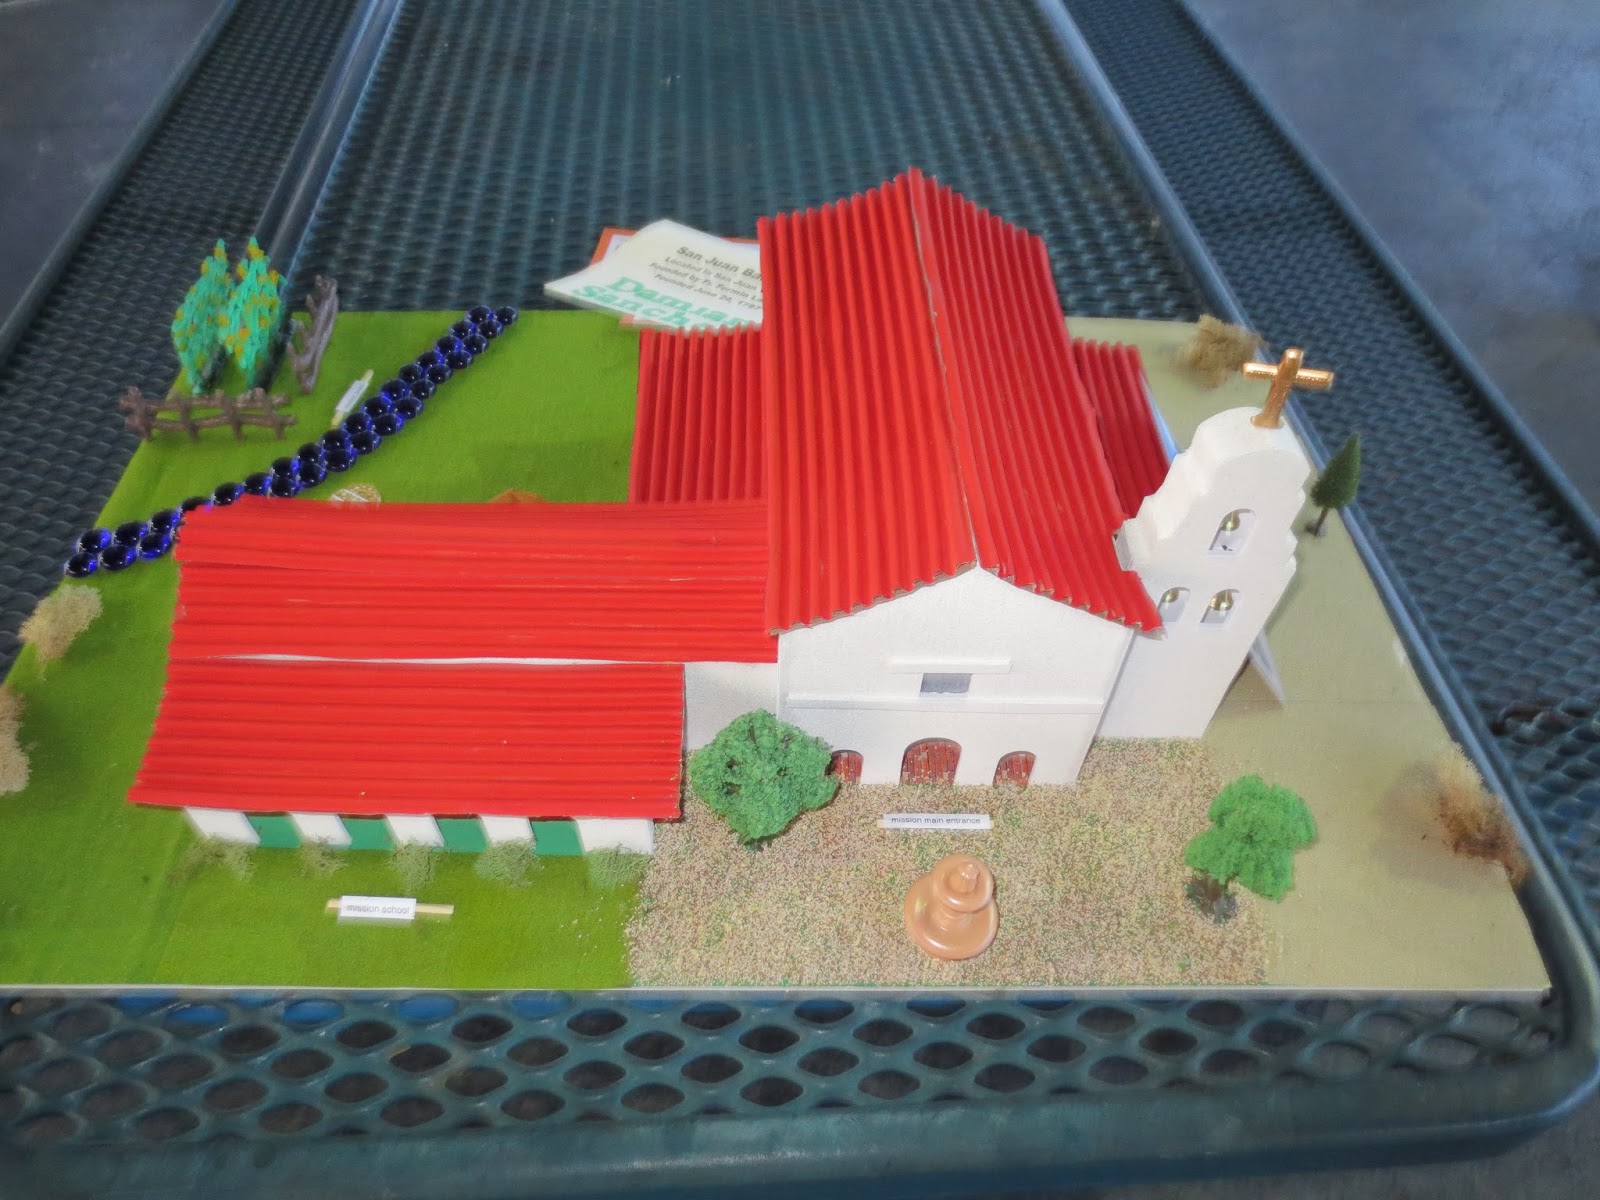
The gardens of the Missions can be created both elaborately like the one below, using store bought flowers and fountains, or simply like the Mission of San Juan
 
http://www.missionscalifornia.com/

http://www.missionscalifornia.com/
 
shown here, using items from around the house. The fence from a game, the blue stones from a candle display, trees from another project. But still the grounds look great even when they are displayed simply.
 
http://www.missionscalifornia.com/
 
Or when a bunch of different items are used in unison to create a garden. Even when the products are out of proportation from each other.

http://www.missionscalifornia.com/
 
http://www.missionscalifornia.com/

http://www.missionscalifornia.com/

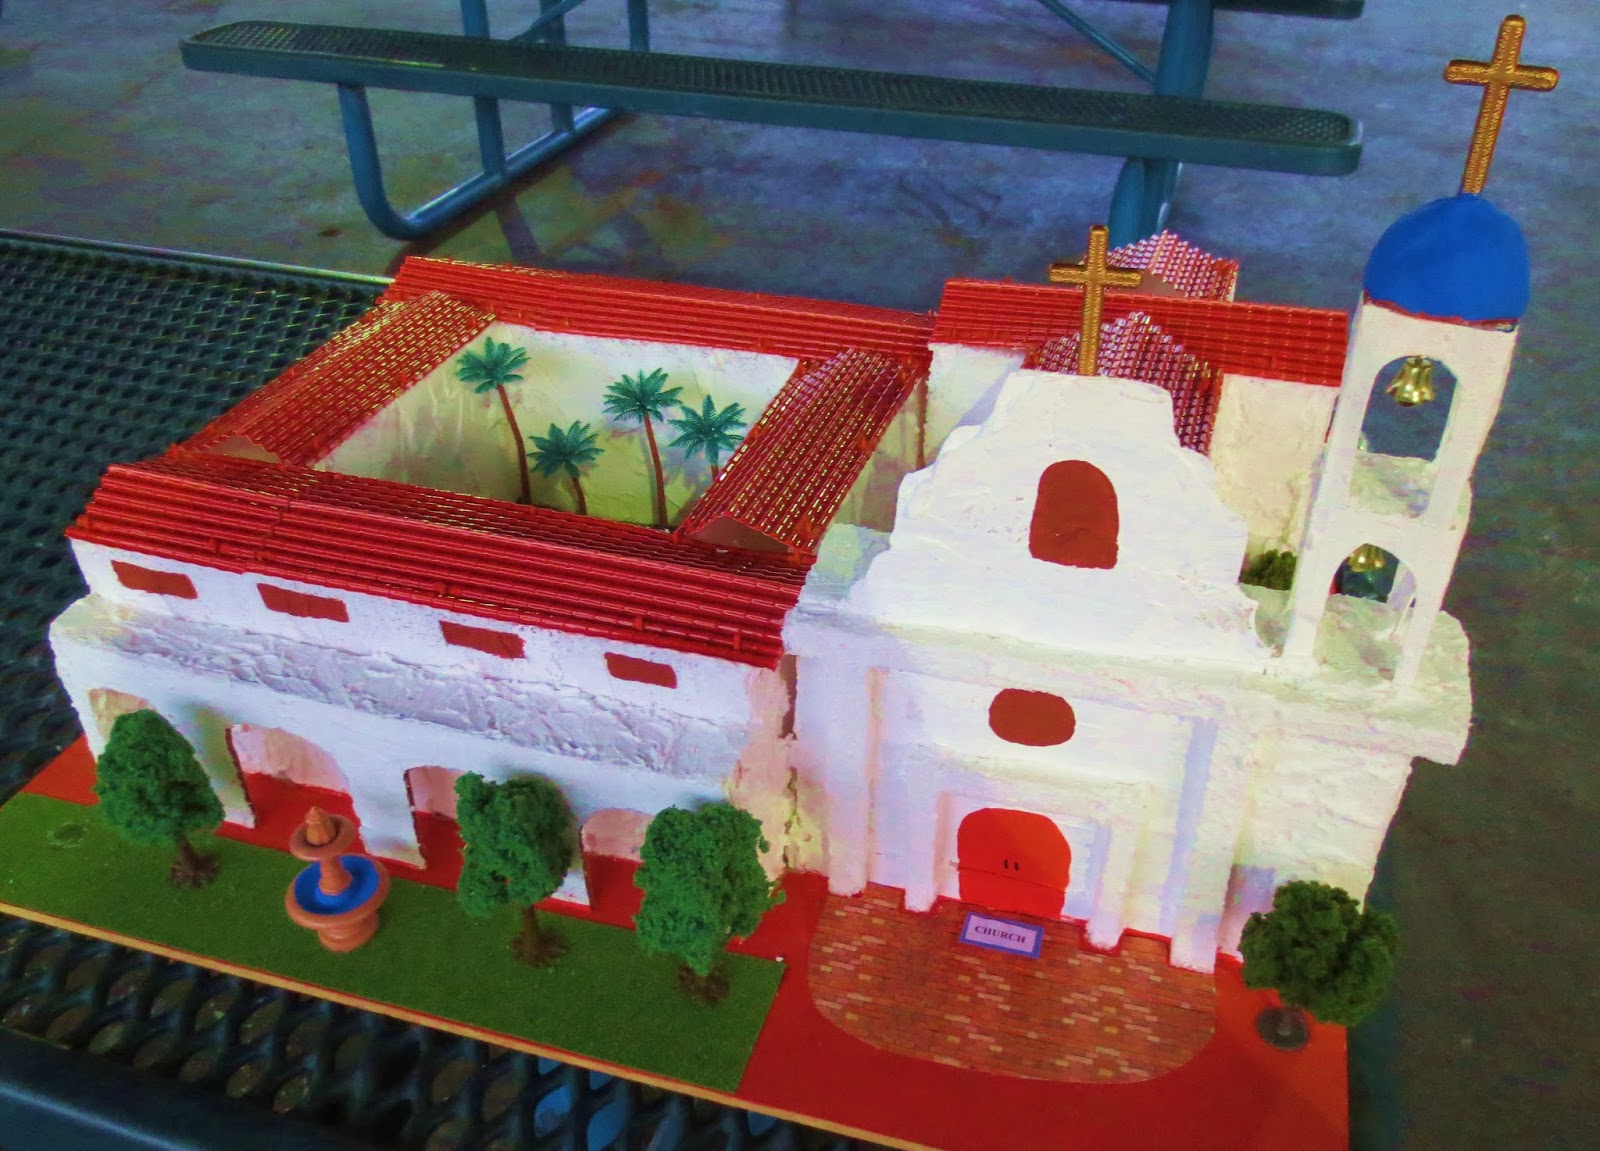
What about the Missions that use unique products in their creation. I have on a previous post discussed the use of several cake mixes to create a cake mix Mission. I have also discussed the use of pasta (lasagne noodles) to create a roof.
http://www.missionscalifornia.com/

http://www.missionscalifornia.com/The student painted the noodles before applying them onto the roof (here). But I have seen the noodles applied first and then painted. Whichever works best. The roof that is pictured here, the noodles apppear to have been spray painted for a more even appearance.
http://www.missionscalifornia.com/
 
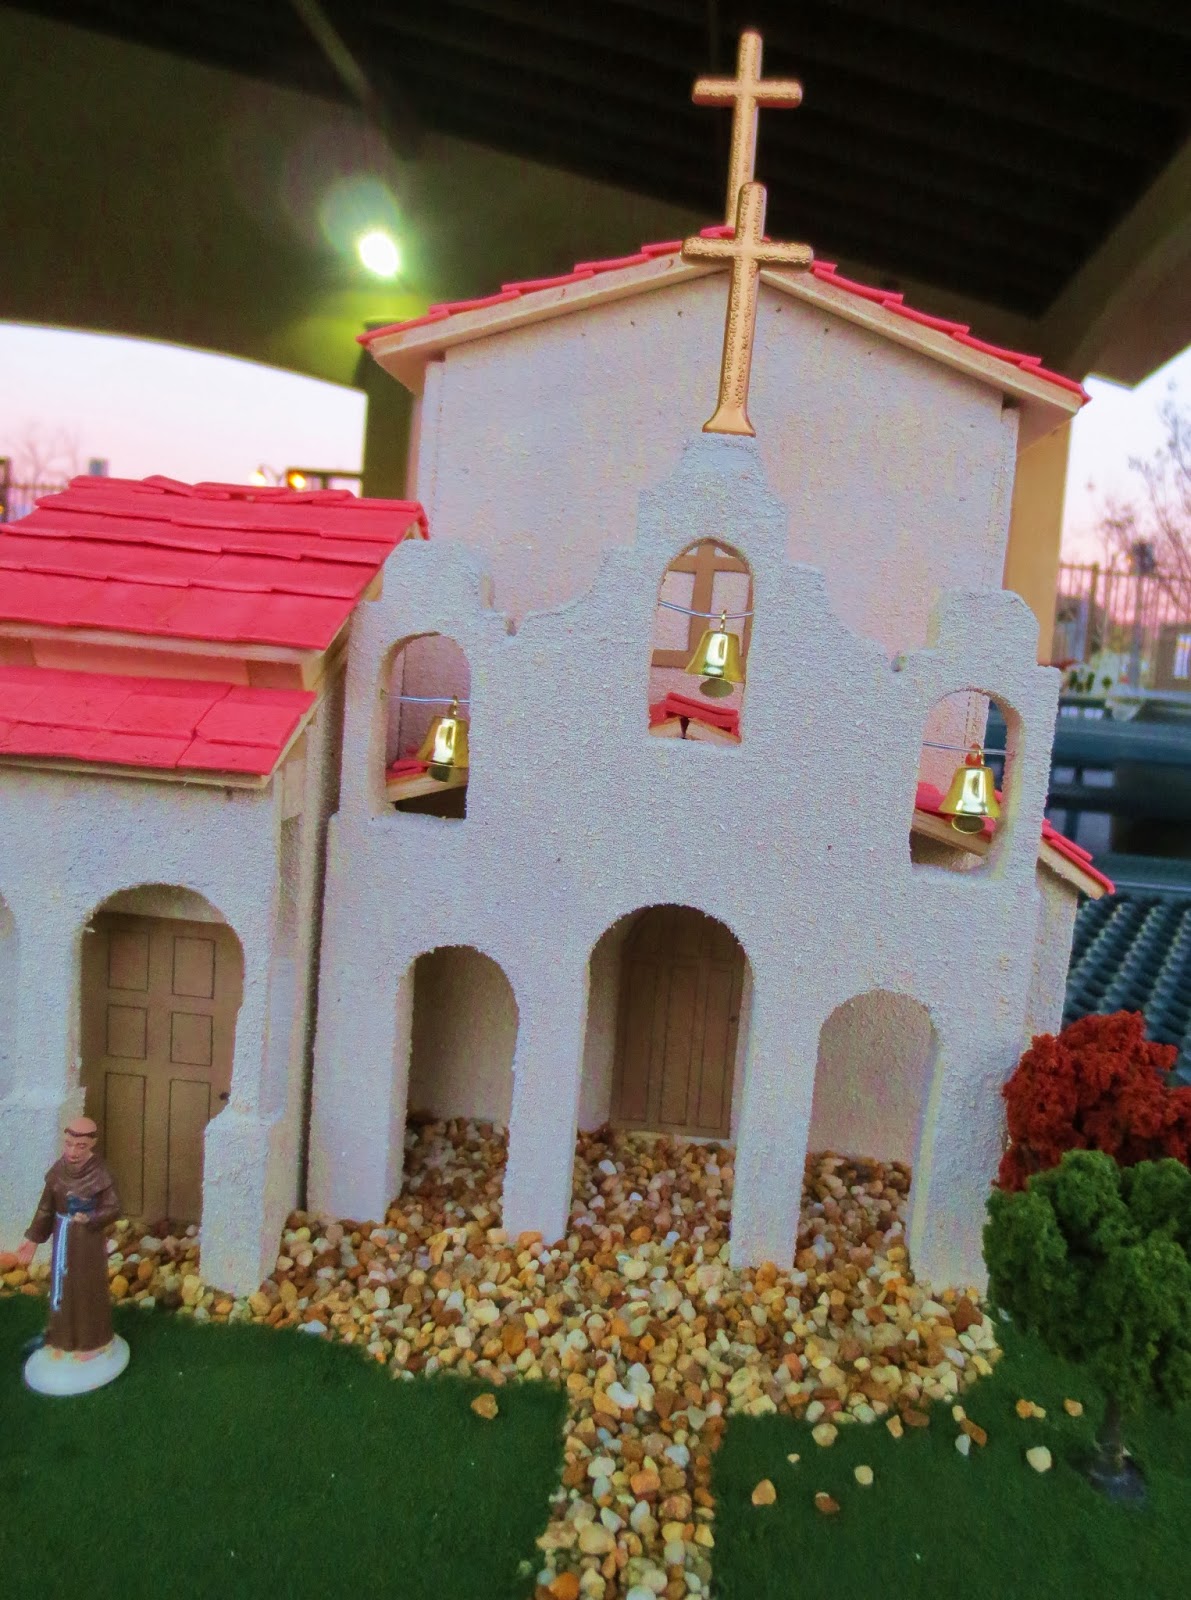
Another unique way to add texture to a roof, is using gum. This student took sticks of a pink colored gum and cut them into square looking pieces. Then glued them onto the roof. I would use a glue gun to keep them in place longer.
 
http://www.missionscalifornia.com/

Another Mission that was so creative was a Mission made from Legos! That is right Legos! I have a picture of the prayer room inside the Mission, but not one of the exterior for some reason. The http://www.missionscalifornia.com/Mission had an outside garden with animals from the Lego collection. Really cute. A project like this would have taken awhile to complete, so allow enough time. Plus the person would have to have alot of Legos to complete this project in the first place. Legos does not have a Mission kit (as of yet). but you can google Missions made from Legos and several appear which can easily be adopted to the Mission you want. Clever idea, which could be started on holiday break.
http://www.missionscalifornia.com/

But, sometimes the simplest of the Missions make some of the best representations. Here the student made a realistic version of the Mission in San Diego using cardboard, plaster, rocks and gravel from the yard, juniper bushes, modeling clay and a set of store bought Mission bells.

http://www.missionscalifornia.com/

Saturday, July 28, 2012

California Mission Pojects

It is so much fun to see the California Mission projects when the kids start to bring them to school. It is always enjoyable to see each students interpretation of the mission that was assigned. Some kids are so creative, they use the most unique materials in their projects. Thinking outside the box and not purchasing pre-made kits! Michael's carries a paper mache that once it is mixed with water is easily moldable, as in this Mission of San Francisco.


Raffia, used for the roof! Inexpensive and creates a wonderful roof top that any fourth grader can assemble. Precut the raffia into four or five inch pieces and adhere with a craft glue. Save your cardboard! Especially the board that has the ripples. Doors to your mission can be cut out of the board and painted. The cardboard can also make perfect head stones if you were to make an adjoining cemetery.

Styrofoam cut into squares and then colored with a brown dye, makes a realistic building. Mixing your media with some homemade items and some purchased, always looks nice. Purchased Mission items are expensive though. Michaels' stores generally have a "sale" section. I would check here first if you wanted to mix and match your media. Some Mission items find themselves in the sale section just because of the sku numbers being dated.


Adding jewels to the Mission makes a wonderful entrance. Windows can be made from jewels, or in this case the front embellishment above the door adds the right detail.


Make sure when you build your Mission, it is on a sturdy base. Styrofoam boards can be purchased at the craft store and then cut down to the required size. Do not make the base too big, as it will be hard to carry - and hard to display. I have seen beautiful projects that have been left on top of the cabinets only because there was no room left to display them when it came time for Open House. A manageable display always gets displayed.


Rooftops can be assembled using pasta. Lasagna pasta, Rigatoni, and Farfalle (bow tie pasta) are used the most. Pasta is easily glued on to the project, and pasta is easily painted. This student took it a step further and sprinkled colored sand on top of the roof to add a rustic element to his project. Gives the mission a feel for being out in the middle of no where - like how they were. Roof tops are usually painted a reddish color or brown. I discussed the use of
pasta on mission projects on an earlier post.


 A California Mission made from a cake mix (actually they used five cake mixes), came out beautiful! I have not seen this done before, but apparently it was easy and alot of fun to do! This student even included the step by step instructions on how they assembled this masterpiece!


For more ideas click here! And if you found this helpful, please let me know by making a comment.

Saturday, February 13, 2010

Mission Report & Projects - Fourth Grade

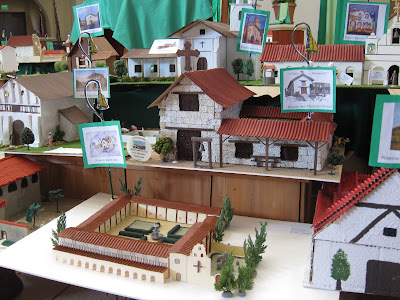
When you think of Fourth Grade you immediately remember doing a California Mission project. This was a time you generally spent with your Dad building something big. It generally took several days and was a time you will fondly remember...! Yikes, how do we construct a Mission? How can we make our mission realistic and different? In this post I will share with you several mission projects that were turned in which were (in my opinion) exceptional. A lot of thought and planning went into these missions and the materials the students used were generally household products! Gone are the days of the sugar cube mission! I linked each photo to the mission that the student researched, so if you click on the photo it will take you to that mission's web page.

I loved the use of the lasagna noodles as the roof for this mission! Practical and inexpensive, plus looked awesome. This student constructed the building with cardboard and then covered it with paper mache. They painted the board brown for the ground and used green roll out grass which was purchased at the local craft store in the "Mission Section." The student used modeling clay to make the fountain and purchased pink mini flowers found in the "Wedding Section" for the floral displays around the mission. Several students used pasta for their roof's. There was Mostacolli and Elbow pasta! So creative! One student used rice! How perfect was that! Looked awesome. Another student used the "exposed" side of the cardboard to show the rippled roof look (inexpensive.)


The accessory items to the Missions themselves were so creative and so easy for the students to put together themselves. One student made a fountain out of several pieces of Styrofoam. She then covered the bottom half with the roll out simulated brick paper found at the craft store in the "Mission Section," and painted the water and the green algae. She added a mossy effect with the green planting material purchased at the craft store. A student made crosses out of Popsicle sticks (as seen in the second photo from the top). A marked grave can be made from a mound of clay covered with polished rocks and a cross on top (as seen below). The sand roll out paper from the craft store can be cut and made into walkways (the photo of the first and fourth mission show this). Walkways were also made out of stones and the purchased sand you can find at the craft store. Grassy areas were either painted or the students used the roll out grass found in the "Mission Section." Clay rolled into balls and then stuffed with plastic foliage made creative potted plant displays. Another student made their entire mission out of the rectangular Styrofoam kit that can be purchased also at the craft store. If I can remember it was ten dollars for a medium sized box. I figured two boxes were probably needed and I past on this medium. But, this student created her mission and then painted the Styrofoam pieces the tan color and the terra cota color. A great site for other "accessory" ideas and using materials found around the home is this Sylvan site.


I liked this mission project because the student visited the mission and incorporated the pictures of himself at the mission onto the display board. You can see the pictures of the mission and how they compared to his interpretation of the mission. He elevated the information card on the display board so it stood out from the other pieces of information.

Can I have a favorite without hurting any one's feelings or efforts? Because I have to say this mission display was awesome. This is the San Gabriel Mission and the student (who must become an architect or thank Dad for doing his project), built the mission so the roof would come off and you could see inside the mission. You could see the pews in the church, the communion rail, and the altar with the statues. The windows were made out of clear transparency paper cut to size and the panes painted onto them. The prayer garden next to the mission was full of plants and fountains and statues. The student even had the grape vine walkway which the mission has. Truly amazing. It was like a dollhouse!


The teacher gave the students the option of building a mission with no research report, doing a research report with a shadow box, or doing a research report with a historical picture scroll. We opted to do the shadow box with the research project. I wanted my son to learn how to research a topic and then decide the best pieces of information and put it together into a well thought out paper. Which now having seen the projects the other students turned in I am glad we chose this. I had no idea the creativity that had gone into these projects. Which is why I decided to share them with you. I hope it helps in your concept of your mission. Our projects were on display the night of Open House at the school. The students received extra credit if they came in costume and each were required to man their mission and explain their project to the parents that wondered up and down the display aisles that night.


We visited three missions, the one in San Luis Obispo the one in San Juan Capistrano which you can see pictures of. We also toured the one in Carmel, which is an awesome mission in an awesome town! I love Carmel. Well, this is the end of my post all I can say is happy creating!

LinkWithin

Related Posts with Thumbnails