Thursday, July 31, 2014

The High Roller - The Linq at Las Vegas


http://en.wikipedia.org/wiki/High_Roller_(Ferris_wheel)

 
 The High Roller, is a 550 foot tall giant Ferris type wheel that continuously rotates. It is the worlds tallest observation wheel to date. It is located in the new Linq shopping quarter. We saw it being built and put together the last two years (I believe construction began in 2011), it looked so intimidating when the wheel was being framed. I am deathly afraid of heights, so this ride was going to be a nerve racking one and one to cross of a "bucket list." However,

with the knowledge that forty people can fit into one of the pods - I felt more comfortable, and in my mind I told myself it would be like an elevator ride, you "can do it."

But.... to my surprise we happened to get our own pod. Just the four of us! We purchased
our tickets from an employee who stood out on the front entrance the the shopping area called the Linq. The tickets were $20 each before 7pm and $35 thereafter.

We timed it so we would ride the High Roller at dusk and be able to see the sunset. The entire rotation takes 30 minutes. The pods DO NOT STOP. To my surprise you need to hop on while the pod is moving, and you need to hop off as it is still moving. There is a screen inside the pod which has an informational video on the High Roller and it periodically flashes the number of feet the pod is in the air. You are ascending to 85 feet, 250 feet, 475 feet, to 550 feet! Then the decent begins... and I can breath again!


There is the most spectacular views of the strip. You can see for miles. You are eye level to the planes when they come in and the birds are below you. At full dusk, the LED lights come on the High Roller. At night is when most of the riders choose to ride the Ferris wheel. When we
exited the ride, there was a long line forming. When we came on the ride, we were able to walk right on. We were able to see the lights and the sunset, which was good for me - so I can


 experience the High Roller both ways as it will be a feat to get me to go up to 550 feet again. The sheer mechanics of each pod is enough to fend me away. The pod is on a track that ticks. You can hear the pods ticking to each "linq" in order for it to stay upright as the wheel goes around. All I can say is I am glad I went on it. My husband and friends thought it was the greatest thing they ever rode. It is certainly worth
the experience of riding the tallest observation wheel in the world! The only draw back is that the wheel is off the beaten path of the main drag and I am sure it is hard for people to see where it is unless you know where to look. The Linq shopping quarter has many fun stores to pop into such as: The Polaroid Fotobar Store. This store has photo opportunities with a mock Polaroid Insta Frame you step into that has Las Vegas written at the bottom, a life size Andy Warhol figure to take a photo with. Totally cool! 
http://en.wikipedia.org/wiki/High_Roller_(Ferris_wheel)

Wednesday, July 2, 2014

Graduation Party - Planning an at Home Grad Party


Planning a graduation party you must first select a theme. Obviously graduation, but every year part stores will improve the products they have offer and maybe a napkin, or party favor will have certain colors or images you might want to capitalize on. This year I found at Target black and white beach balls which I used as my inspiration and created a theme around the black, the white and butcher paper. A trend this year was chalkboard embellishments and writing on a black chalkboard like poster boards and labels. I incorporated this also.I hung the beach balls from the outside rafters along with several black tissue paper lanterns I picked up from Party City (a set of three was $5.99). This created a fun atmosphere in the back patio. This can be done a day ahead so you do not have to scramble the day of the party.


For the tables, I painted terra cota pots in the black
and white theme. I tried to replicate the black and white stripes that were on the beach balls. I took puffy paint and added the year of the graduation to the stripes on either side. Class of 2014.

I cut various photographs of my sons school year into stars. I tried to find pictures of him with the friends that were coming to the party. I developed these into black and whites. The stars I glued onto wooden skewers. The rest of the photo's I cut out into circles and used them into confetti on the tables. (So the confetti was red, yellow, blue stars and the circle photo cut outs). I also added on the back of one of the photo's that the centerpiece could be taken home. I did not want to store all of these, and knew I could not toss after I spent so much time making them. The tables also had graduation cap bubbles. The guests loved to open these and blow bubbles throughout the night and it made for some great photo's when we went back and looked through them!


Party favors are always a must for me. I love them! I love receiving a gift for attending an event, plus it makes a nice memento for the guests. I have discovered that people display these on their shelves at home or in their office and use them as conversation and memory pieces. I just love them! For my daughters I took a pic of her jumping infront of the school she graduated from. I also used this pic on her party invitations (which I ordered from tinyprints.com) The pic I inserted into the plastic packaging that the Quickutz dies used to come in. The square part on the back I inserted a chocolate candy into (Ghirardelli Chocolate Squares). Ghirardelli has several kinds of chocolate ones and the package color changes with each different type, so I chose the package that matched her school colors. I also used the quote from Confucius "Wherever you go, go with all your heart." I cut out an actual heart from my die cuts and glued that onto the tag part in the back of the plastic package.

For my sons, I saw on Pinterest.com a glass bulb filled with candy and a saying that said "Here's to your bright future!" I found these at Michaels' Craft and Hobby stores for $1.99. They had colored ones too for $2.99. Found ribbon with the Class of 2014 on it at Michael's too. I filled the bulbs with M & M's for cost saving reasons, but yellow Lemon Heads would have been perfect!

Dessert table food is easy. These can be found all over Pinterest. The Reeses candy with the chocolate flat candy on top to create a graduation cap that was featured on Bakerella.com,  I did this for my daughters party and found that they took too much time. For my son's I found on Pinterest, Reese's with a black paper top glue gunned to the top and then a string attached to the top to represent a graduation cap. These were easy peasey. I found gold metallic thin ribbon at a craft store and tied a knot on one end. I punched a hole into the black craft paper square, threaded the ribbon through so it would stop at the knot and then cut the
ribbon accordingly. When the craft paper was glue gunned to the candy it created a seal. I made these several days in advance. Much easier, looks just as nice. The other ideas for the dessert table are ring pops with a tag that says "Class Rings," smarty candies that has a placecard that states "You Did it Smarty Pants," Nerds - obviously for the Nerds in the class, and Extremes for the extreme personalities in the class. I also
took the Pepperidge Farm cookies and tied a ribbon around them and made a placecard


http://www.pinterest.com/pin/414190496952761635/
that said "Diploma's." There were so many cute ideas on Pinterest. I stopped at these. I had cupcakes, a variety of cookies - easy to eat and not everyone wants a slice of cake or a whole cupcake, and I made an Orange Cake with the place card stating "Orange You Glad You Graduated?" It was the second item to go. The first were the Extreme's. The kids loved these. They are easy to eat and portable.
The main course, my husband made. We had a traditional bar-be-que with steak, tri tip, sausages, scallopped potatoes, two different kinds of green salad, corn on the cob, his version of baked beans which was three different canned brands mixed together with brown sugar and some bar-be-que sauce (very yummy!). Plus corn bread and garlic bread. It was a lot of work. My daughter's we had it catered and I would go that route again.
 
Appetizer's were simple. On each table we had crackers, Chex Mix, grapes and M & M's. We served these cracker and veggie cups with the Ranch Dressing already in. The bar was set up for the adults. I made a sign with drinks named after graduation terms.


The other  festive element is helium balloons. I had them throughout the house. It just looks like a part with balloons on the ceiling with the long ribbon tails. I just wished it was easier to dispose of the helium tanks since my city does not recycle, I have to drive them out to a recycling center in another town. Plus I decorate my bunny statue in the front walk way. She wore a graduation cap in a small size. I got from Party City. They had a stone in it and used them to anchor balloons. I took the stone part out and weaved a ribbon through the hole and tied it around the bunny's neck.
 
Party City also had The Party's Here signs for the lawn. I bought several and used them to line the walkway up to the house. I then diverted the guests to enter through the side gate to the back yard - so I could keep the front door closed. Another cute idea was to have pictures of the graduate in various stages of schooling used to line the walk way. The pics were on a round stick. Or a garland made of various school pics to decorate a wall.  I saw this on Pinterest as well. Where would we be without Pinterest?

Other items on your list should be tables and chairs, table cloths, a game maybe. My son had a swimming party and thus some of the graduation balls were in the pool to decorate. Tables away from the adults so the kids can have their own group. I served small sodas. I don't know why, but whenever I have a party I always find FULL soda cans all over. This way the person finished the soda.  I always take a photo of the graduate with the guest and use the photo on the Thank You card. This way I don't buy thank you cards and the personal touch is always remembered. Besides, who does not want a picture of themselves?

I hope this gives you some ideas. I looked for a site with a detailed party idea and could not find one, so I decided to blog what I had done - then it is handy! Happy Graduation!

Friday, February 28, 2014

Authentique's Smitten and Lovely

 
The paper used on this layout id from Authentique's Smitten line 2012, and some from Authentique's Lovely line from 2013. I was influenced on the structure of the layout by Kelly Goree's Home Grows layout she published on her blog in July of 2009. Even if I used photographs in color and not as many patchwork squares, I liked how it came out. Still not as professional as Kelly's - but hey I have been out of the loop for awhile. This was my sons "Best Day Ever!" He looked forward to the
Valentine Dance at school for a whole month. He made his own appointment at the hairdressers so he would have a cool hair cut. He wanted his hair just like how it was the last time he had a hair cut. He picked out hi clothes in advance and laid them out. Asked a girl in his class to be "his Valentine" so for sure she would dance with him. So cute, how they get all excited about this stuff!
 

Monday, February 24, 2014

Authentique - Lovely Collection

http://authentiquepaper.com/products/Lovely
 I scrapped the photo's from Valentine's Day using Authentique's Lovely collection. We had a great Valentine's evening that was planned by my friend. Yes, she planned the whole evening for all of us. The men got to respond on her E-Vite that she sent out, whether they planned to attend. Her husband then adjusted the reservations according to the number of guests who planned on attending.
I thought the Authentique paper from the Lovely Collection best displayed the photo's from our evening out. The dinner tables had these large Valentine heart shaped suckers in the center, which we promptly put into our mouths after dinner and took some cute photo's with them. It reminded me of the old fashioned Valentine's with the big red hearts. Then I remembered I purchased this paper and still had not used any of it yet. The other embellishments came from Jillibean Soup. The heart shaped wooden button and the oval conversation sticker, and some brads mixed throughout. 


No matter who planned the evening, we had a great time. Dinner in town that consisted of a special Valentine Menu, then we walked to the wine bar (where we had a table reserved for us as well), where we enjoyed spirits and dancing to a live band! The mayor of Covina was even there, and sat at our table! My friend also made Valentine candy stuffed mailboxes! So cute, she decorated them with stickers and filled them with candies... And by accident the women all wore some type of animal print! Just happened that way.

Wednesday, February 19, 2014

Mission Report - Unique Missions

http://www.missionscalifornia.com/
 
This is a post about creating the most unique California Missions using items that you may have already in your home. There is no need to buy a pre-designed Mission from the store that may be costly. This article will show you how to make an elaborate Mission (as shown),
 
http://www.missionscalifornia.com/
 
or a Mission that is entirely created using a piece of cardboard, construction paper, paint and plants from the garden. See Mission below.
 
http://www.missionscalifornia.com/
 
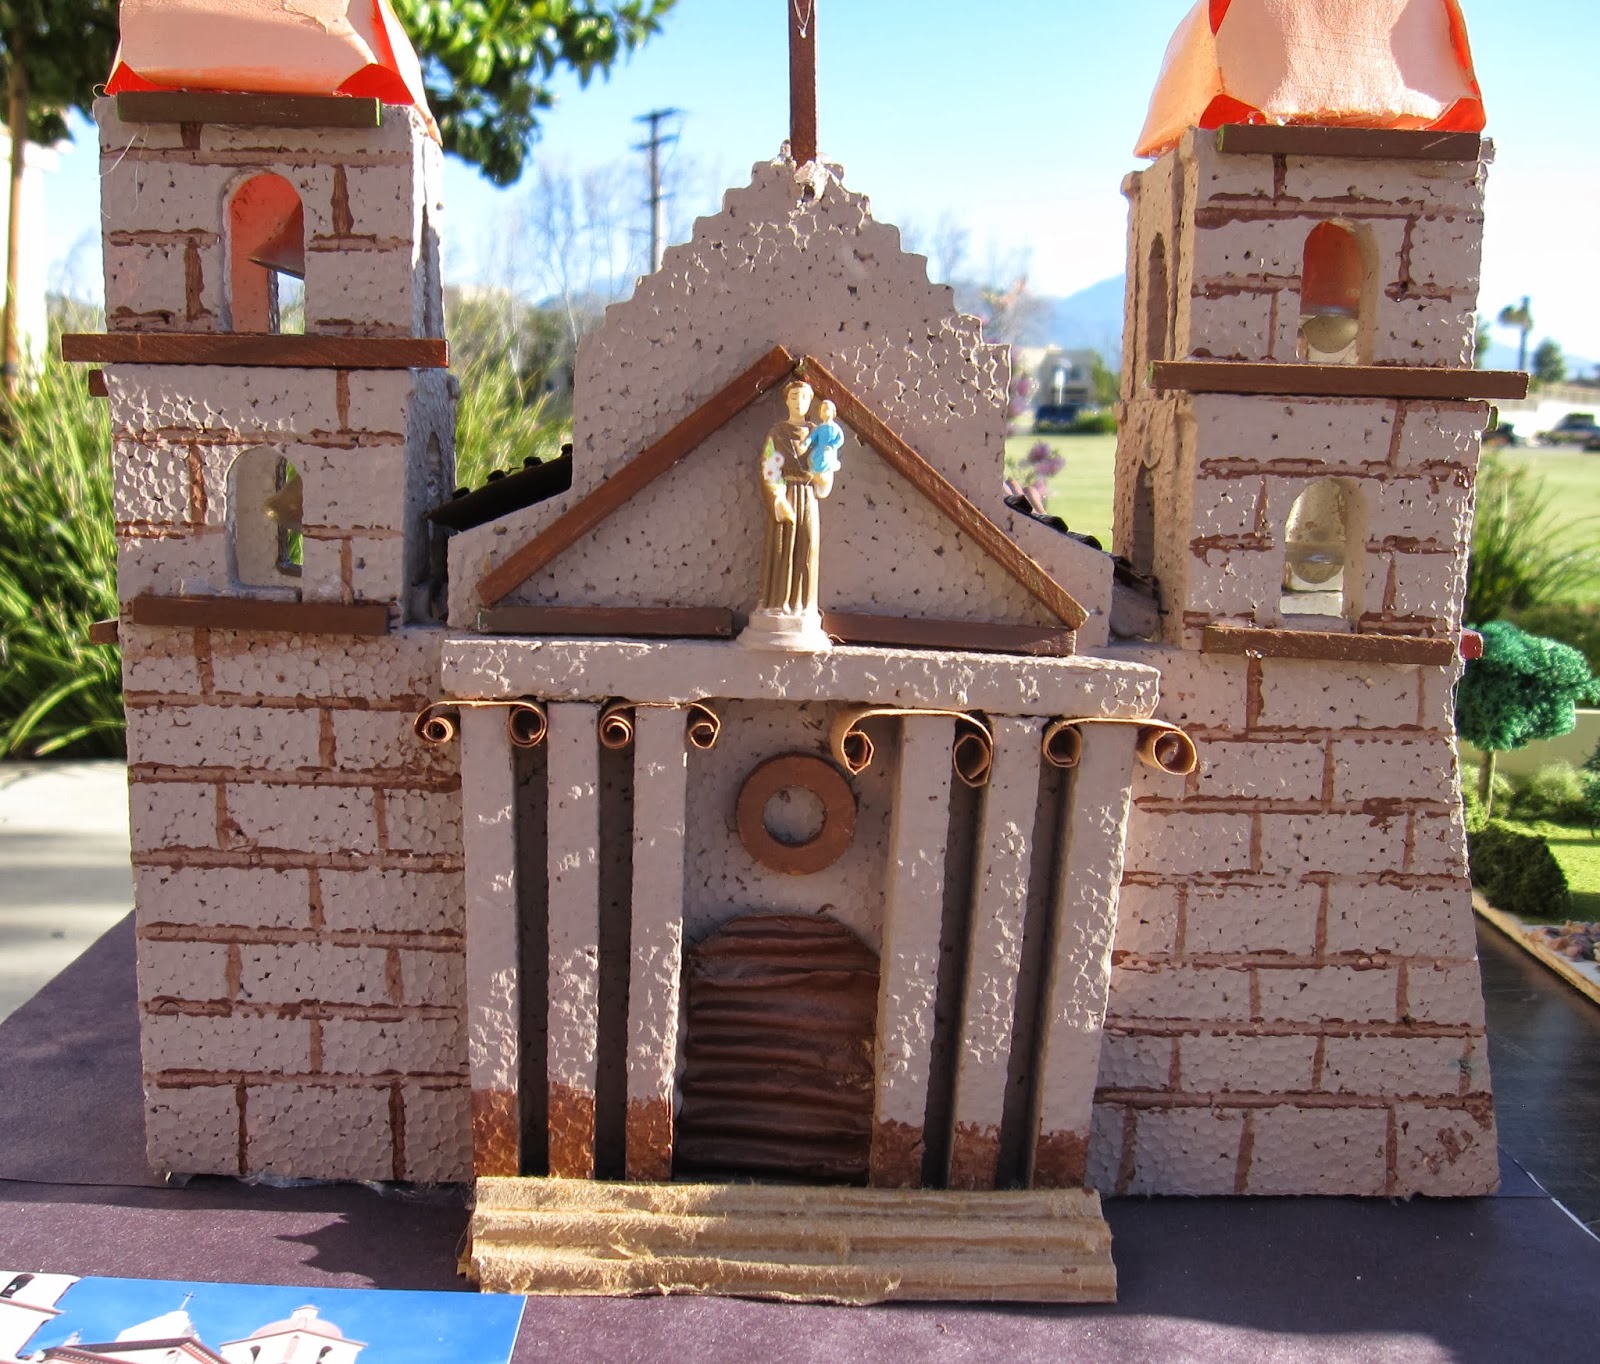
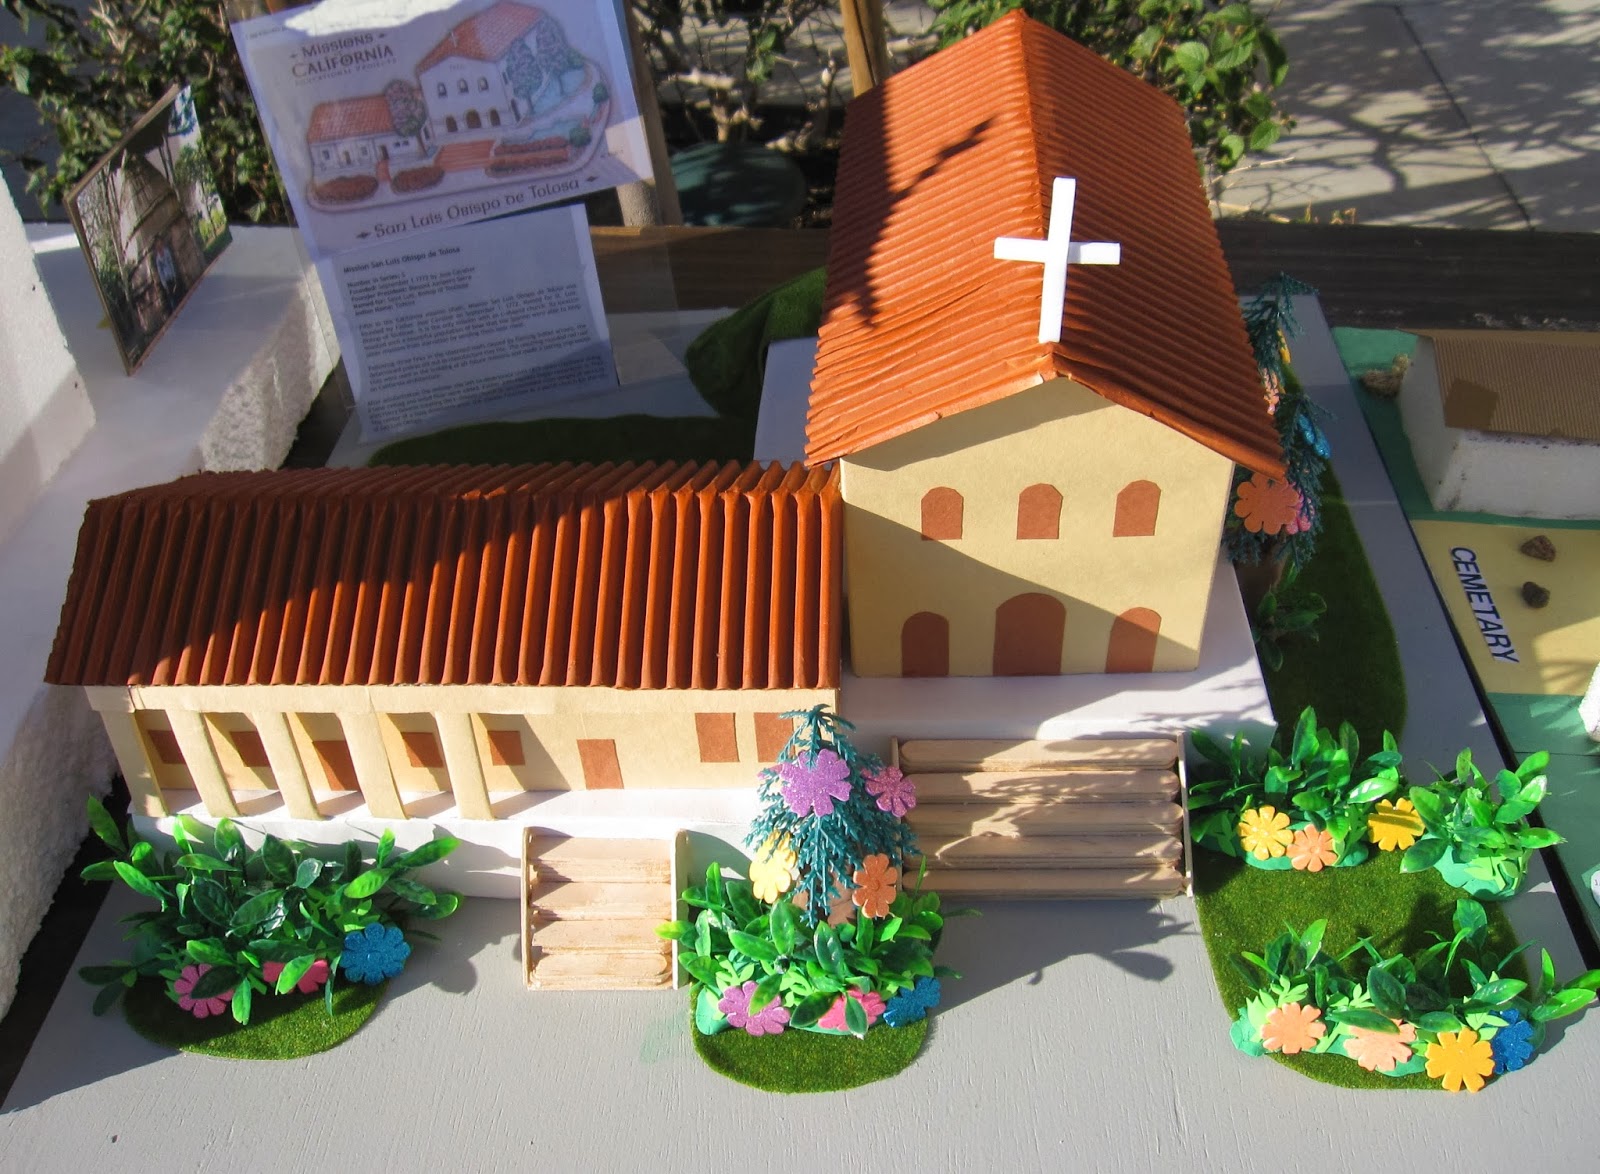
Styrofoam is another useful material. I this case the student cut styrofoam and then painted several coats on it. They used thick paper (or cardboard) to make the curls at the top of the pylons, cardboard stairs, cardboard door and a store bought statue. If you do cut stryofoam an adult should be present as stryofoam cuts really easy and the cutting tool could slip.
 
http://www.missionscalifornia.com/
 
This student used stryofoam and mixed it with cardboard (see below image). One can make the cardboard walls appear like stucco when paper mache is added. I have always used "fast mache." Despite it's name (it does take several hours to dry) this product is easy to use - just add water - and it becomes moldable. It is the perfect product to create your state when studying bodies of water and mountain elevations (another grade level). Construction paper is used on this Mission to create doors and windows. 
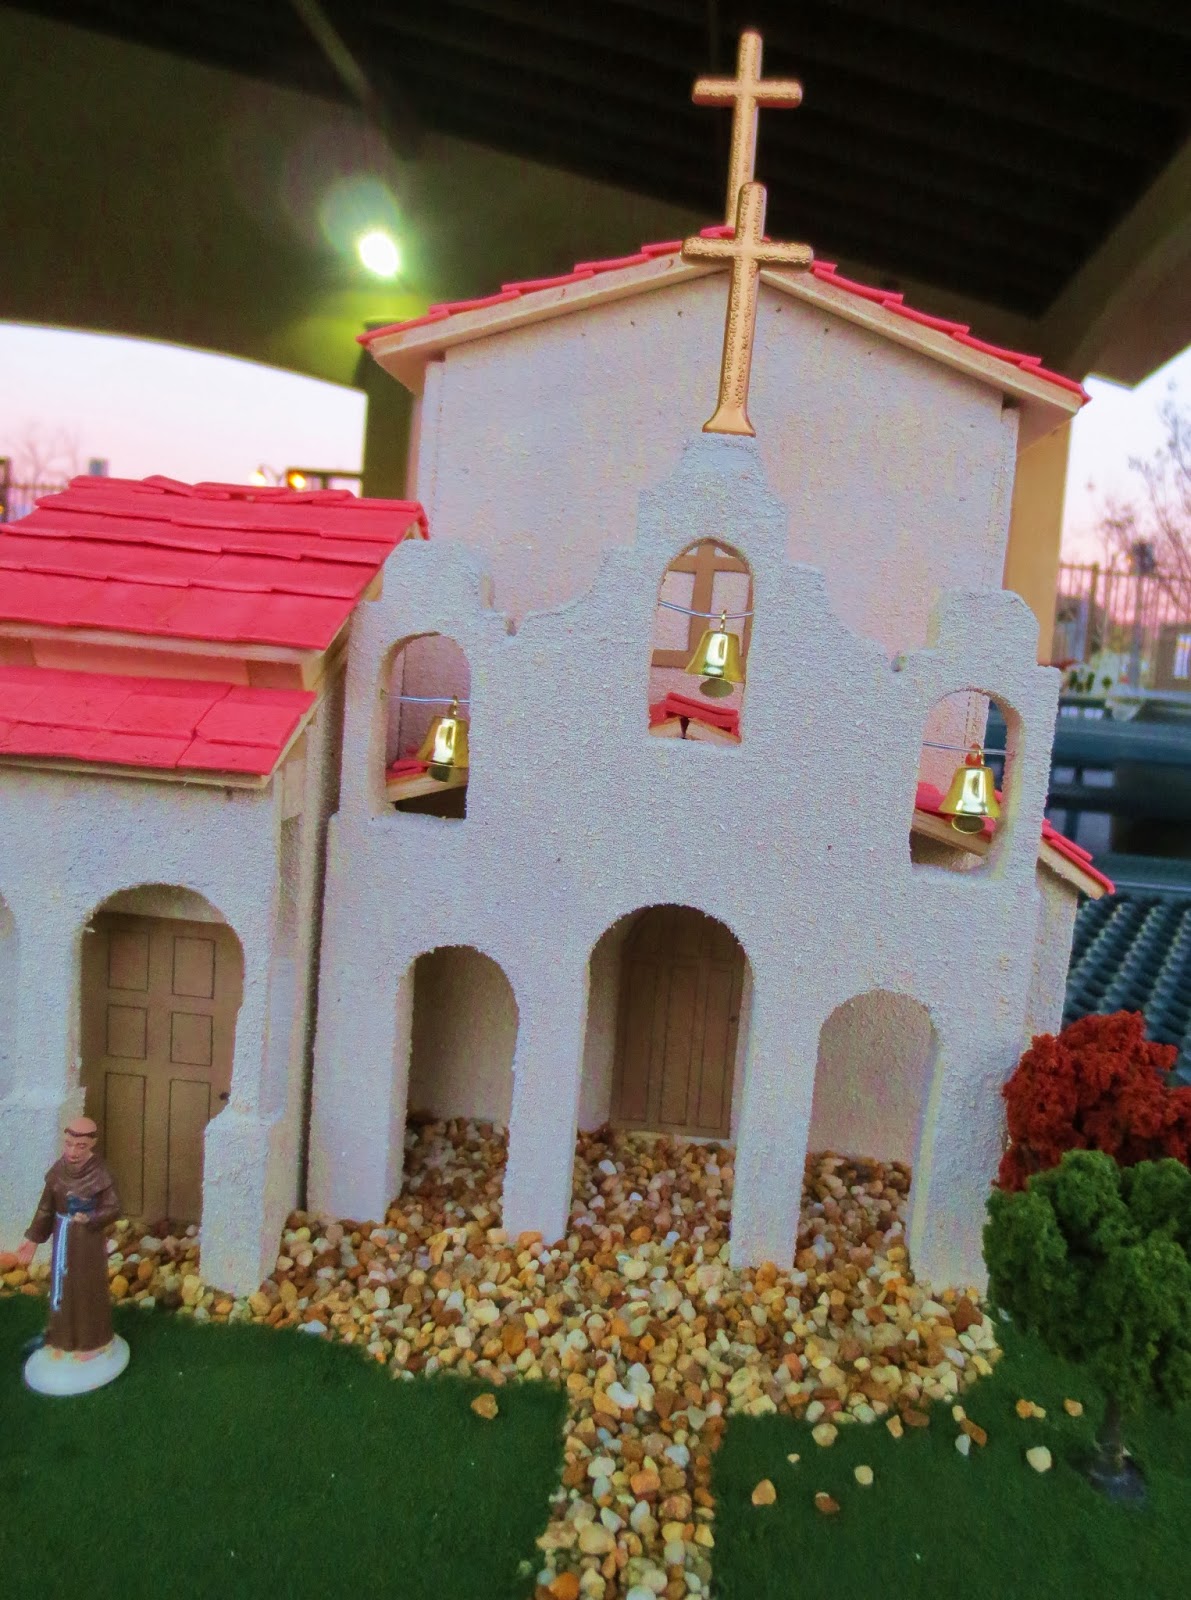
Store bought bells were used in the bell tower. A simple staircase made from construction paper with hand drawn stairs is represented here, and it works! Certainly a Mission created with little supervision.

http://www.missionscalifornia.com/
 
 
http://www.missionscalifornia.com/
 
The Mission here has the store bought roof, bells, plants and statues. The top of the bell tower was carved from styrofoam. The San Carlos de Borromeo de Carmel Mission below is another example of the use of construction paper, wood, some cardboard and items found around the house. A simple Mission that reflects a unique appearance of the aged Mission.
 
http://www.missionscalifornia.com/
 
Display a photo of the Mission next to your finished masterpiece helps to appreciate all of the work that went into the project to make the Mission appear realistic. Some students post a picture of themsleves in front of the Mission to show they have visited the Mission and have a true knowledge of the construction that went into building the mission back in 1772. Even if you are unable to travel to the Mission you have been assigned, a Mission in your area usually has a Gift Shop that will have information about your Mission.
 
http://www.missionscalifornia.com/
 
http://www.missionscalifornia.com/

Another thing to thing about is the board that you will be using to create your mission on. The board itself should be sturdy enough to carry the final Mission out of your home and into the car, and then into the classroom - without dislodging itself or buckeling. Most of the Missions, I have seen are on the 
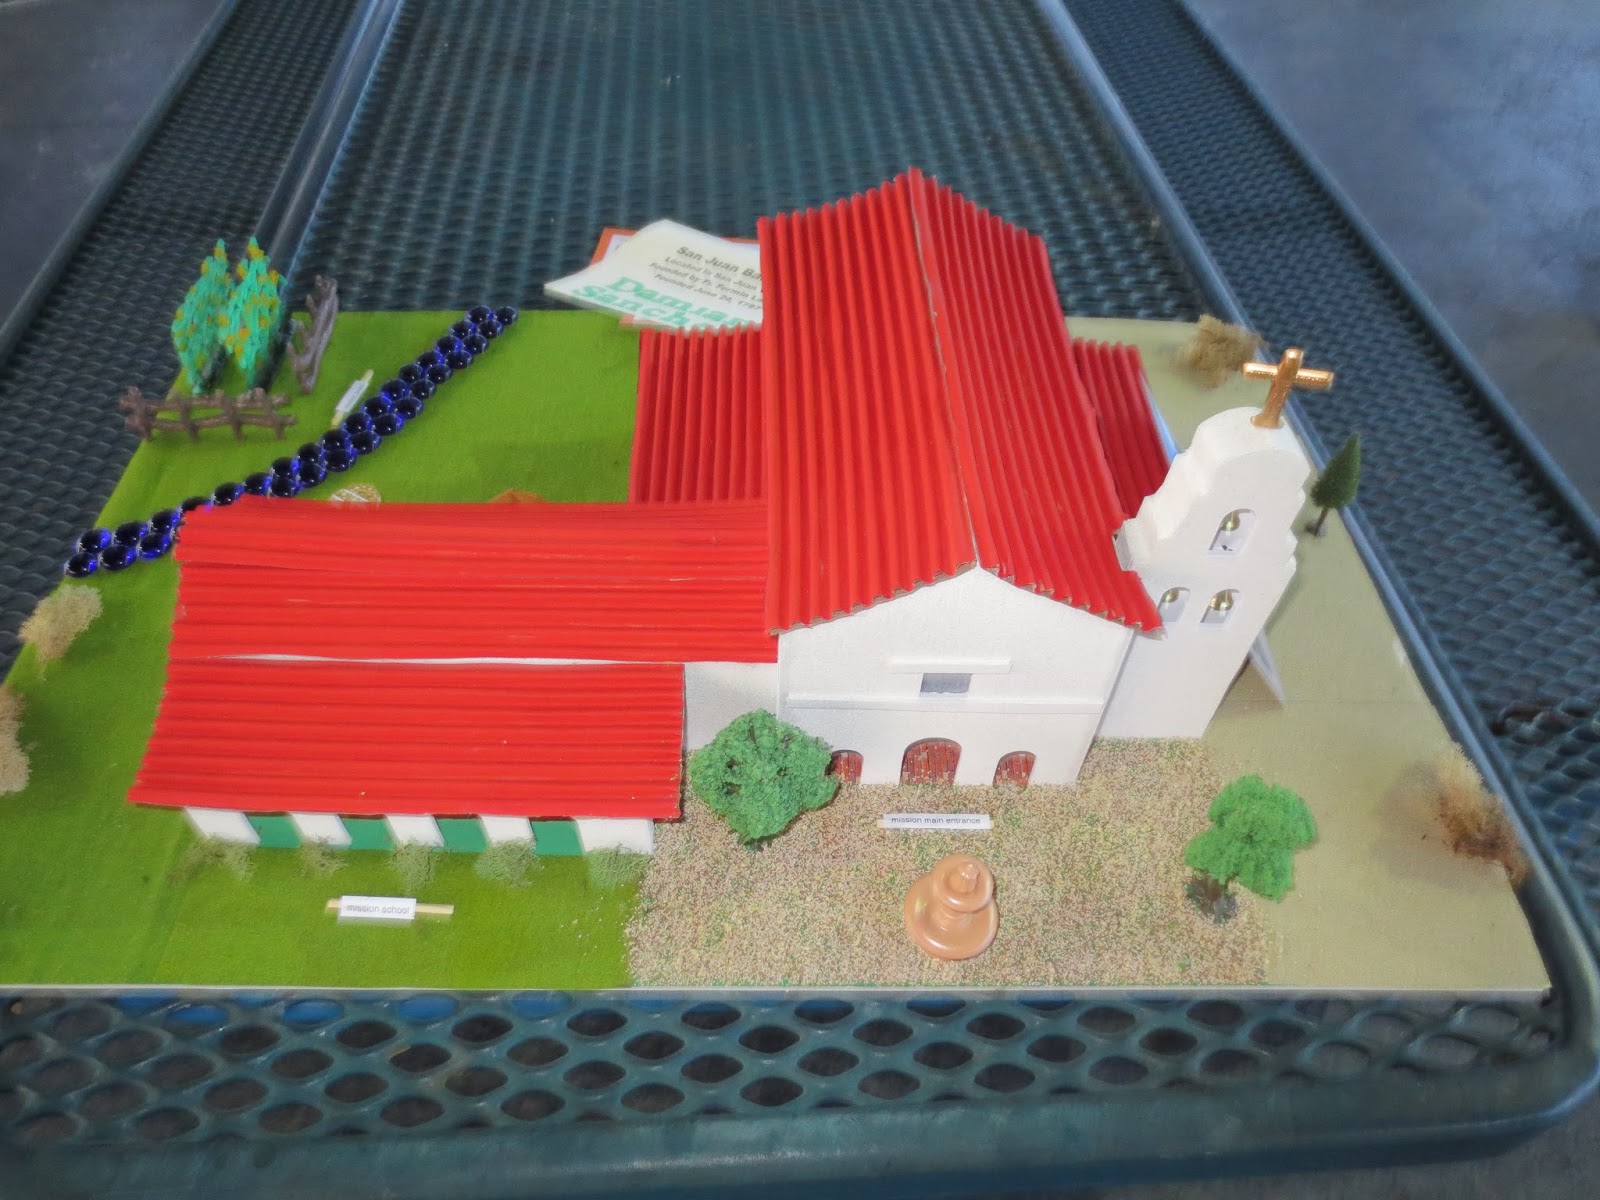
durable display foam board that can be bought at Michael's Craft Stores. The Mission (below), is set on a wood constructed table that is beautifully displayed. I love the use of the same burnt orange brown paint on both the wood table and on the roof of the Mission.
 
http://www.missionscalifornia.com/
 
The gardens of the Missions can be created both elaborately like the one below, using store bought flowers and fountains, or simply like the Mission of San Juan
 
http://www.missionscalifornia.com/

http://www.missionscalifornia.com/
 
shown here, using items from around the house. The fence from a game, the blue stones from a candle display, trees from another project. But still the grounds look great even when they are displayed simply.
 
http://www.missionscalifornia.com/
 
Or when a bunch of different items are used in unison to create a garden. Even when the products are out of proportation from each other.

http://www.missionscalifornia.com/
 
http://www.missionscalifornia.com/

http://www.missionscalifornia.com/

What about the Missions that use unique products in their creation. I have on a previous post discussed the use of several cake mixes to create a cake mix Mission. I have also discussed the use of 
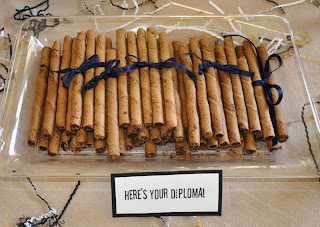
pasta (lasagne noodles) to create a roof.

http://www.missionscalifornia.com/

http://www.missionscalifornia.com/The student painted the noodles before applying them onto the roof (here). But I have seen the noodles applied first and then painted. Whichever works best. The roof that is pictured here, the noodles apppear to have been spray painted for a more even appearance.
http://www.missionscalifornia.com/
 
Another unique way to add texture to a roof, is using gum. This student took sticks of a pink colored gum and cut them into square looking pieces. Then glued them onto the roof. I would use a glue gun to keep them in place longer.
 
http://www.missionscalifornia.com/

Another Mission that was so creative was a Mission made from Legos! That is right Legos! I have a picture of the prayer room inside the Mission, but not one of the exterior for some reason. The http://www.missionscalifornia.com/Mission had an outside garden with animals from the Lego collection. Really cute. A project like this would have taken awhile to complete, so allow enough time. Plus the person would have to have alot of Legos to complete this project in the first place. Legos does not have a Mission kit (as of yet). but you can google Missions made from Legos and several appear which can easily be adopted to the Mission you want. Clever idea, which could be started on holiday break.
http://www.missionscalifornia.com/

But, sometimes the simplest of the Missions make some of the best representations. Here the student made a realistic version of the Mission in San Diego using cardboard, plaster, rocks and gravel from the yard, juniper bushes, modeling clay and a set of store bought Mission bells.

http://www.missionscalifornia.com/

Saturday, February 15, 2014

Basic Grey Clippings

http://www.basicgrey.com/scrapbook/shop/collections/show/current/clippings
 
I finished a page for my sons School Album. I used Basic Grey's Clippings for the paper. I know the line came out in 2012, but I am just now using my goods that I have collected. I love buying scrapbooks supplies and I have every intention of using them right away, but time escapes me. I am making it a mission to finish his School Album before he graduates from the eighth grade. At least, get a good portion of his school years finished!

http://www.basicgrey.com/scrapbook/shop/collections/show/current/clippings

LinkWithin

Related Posts with Thumbnails